Software Template Patterns for Self-service
|
Quick Logout Links Prior to starting this module, click the following two links and make sure you log out of previous sessions to prevent errors related to performing actions as the wrong user. |
Introduction
Software templates are the heart of Red Hat Developer Hub (RHDH). In this section, you will learn how to leverage software templates to enable self-service integration of third-party tools and platform capabilities. During this session, you will explore different patterns and self-service approaches to reduce cognitive load, scale operations, and promote best practices across the organization.
For this module, you are a Platform Architect working for an online marketplace. The organization has already set up Red Hat Developer Hub and has many applications built and deployed. However, the Platform Engineering team is struggling to implement self-service for third-party components and is currently spending too much time manually creating namespaces, configurations, and provisioning databases. The goal is to free them up so they can focus on developing AI capabilities on top of the platform. Your challenge is to identify the best patterns to meet both the organization’s and the team’s needs. Let’s explore different architectures and design patterns for self-service.
Architecting Software Templates
Architecting software templates is essential for implementing platform engineering best practices, enabling scalability, and accelerating the adoption of cloud-native tools. Establishing repeatable patterns that align with organizational guidelines and industry standards is key to building a successful self-service approach. Let’s review the core structure of software templates:
Software Template Structure
The software template structure in folders and files will vary depending on the component type, technology used, and specific requirements. Our approach is to separate different responsibilities into distinct folders and files, such as separating application source code from deployment manifests for each component.
my-template
├── manifests
│   ├── argocd
│   │   ├── ${{values.component_id}}-argocd-app-dev.yaml
│   │   └── ${{values.component_id}}-argocd-repo.yaml
│   └── helm
│       └── app
│           ├── Chart.yaml
│           ├── templates
│           │   ├── _helpers.tpl
│           │   └── vm.yaml
│           └── values.yaml
├── skeleton
│   └── catalog-info.yaml
└── template.yaml
skeleton Folder
This folder contains the application source code and catalog file, including the information to be displayed in the component’s UI within RHDH.
manifests Folder
This folder contains the application’s Kubernetes manifests and additional files that enable RHDH to build and deploy that component in a Kubernetes cluster.
template.yaml File
The template.yaml file defines how component creation will interact with RHDH by specifying the UI experience for end users, including fields, inputs, and workflow. Additionally, it describes backend interactions and activities that occur after the end user clicks the create button, such as creating repositories and GitOps objects.
Template actions
The following actions can be used to define the steps and actions in the template.yaml representing the backend tasks required.
-
fetch:template: Retrieves and processes template files -
publish:github: Creates repositories in version control (both the application and GitOps repositories) -
argocd:create-resources: Creates Argo CD applications and point at the newly created GitOps repository -
register:catalog: Adds the new component to the service catalog -
Other custom actions: Organization-specific automation
The Mechanics of Software Templates
We will explore the use case where resources need to be created on the cluster, using the recommended GitOps approach. Helm will use variables from the Helm Charts received from the RHDH UI to build the chart.
Patterns for Third-Party Tool Integrations Using Software Templates for Self-Service
Different patterns can be created to accomplish business and technical needs according to your organization’s guidelines. As a Platform Architect, you need to identify these specific patterns and understand how they will be customized according to the Software Development Lifecycle.
Here are some potential integrations you will explore:
Building Patterns
When building different patterns, it is critical to understand these key considerations:
-
Use Case: What is the specific use case for this component? When and why should it be created, updated, or removed?
-
Example: An in-memory database will be created only in the development environment for development purposes.
-
-
End Users: Who are the intended users? This determines access control and the level of flexibility granted to different user groups, such as developers, data scientists, and AI engineers.
-
Example: The Java team will be the only group authorized to create this component, while the legacy team will have read-only access.
-
-
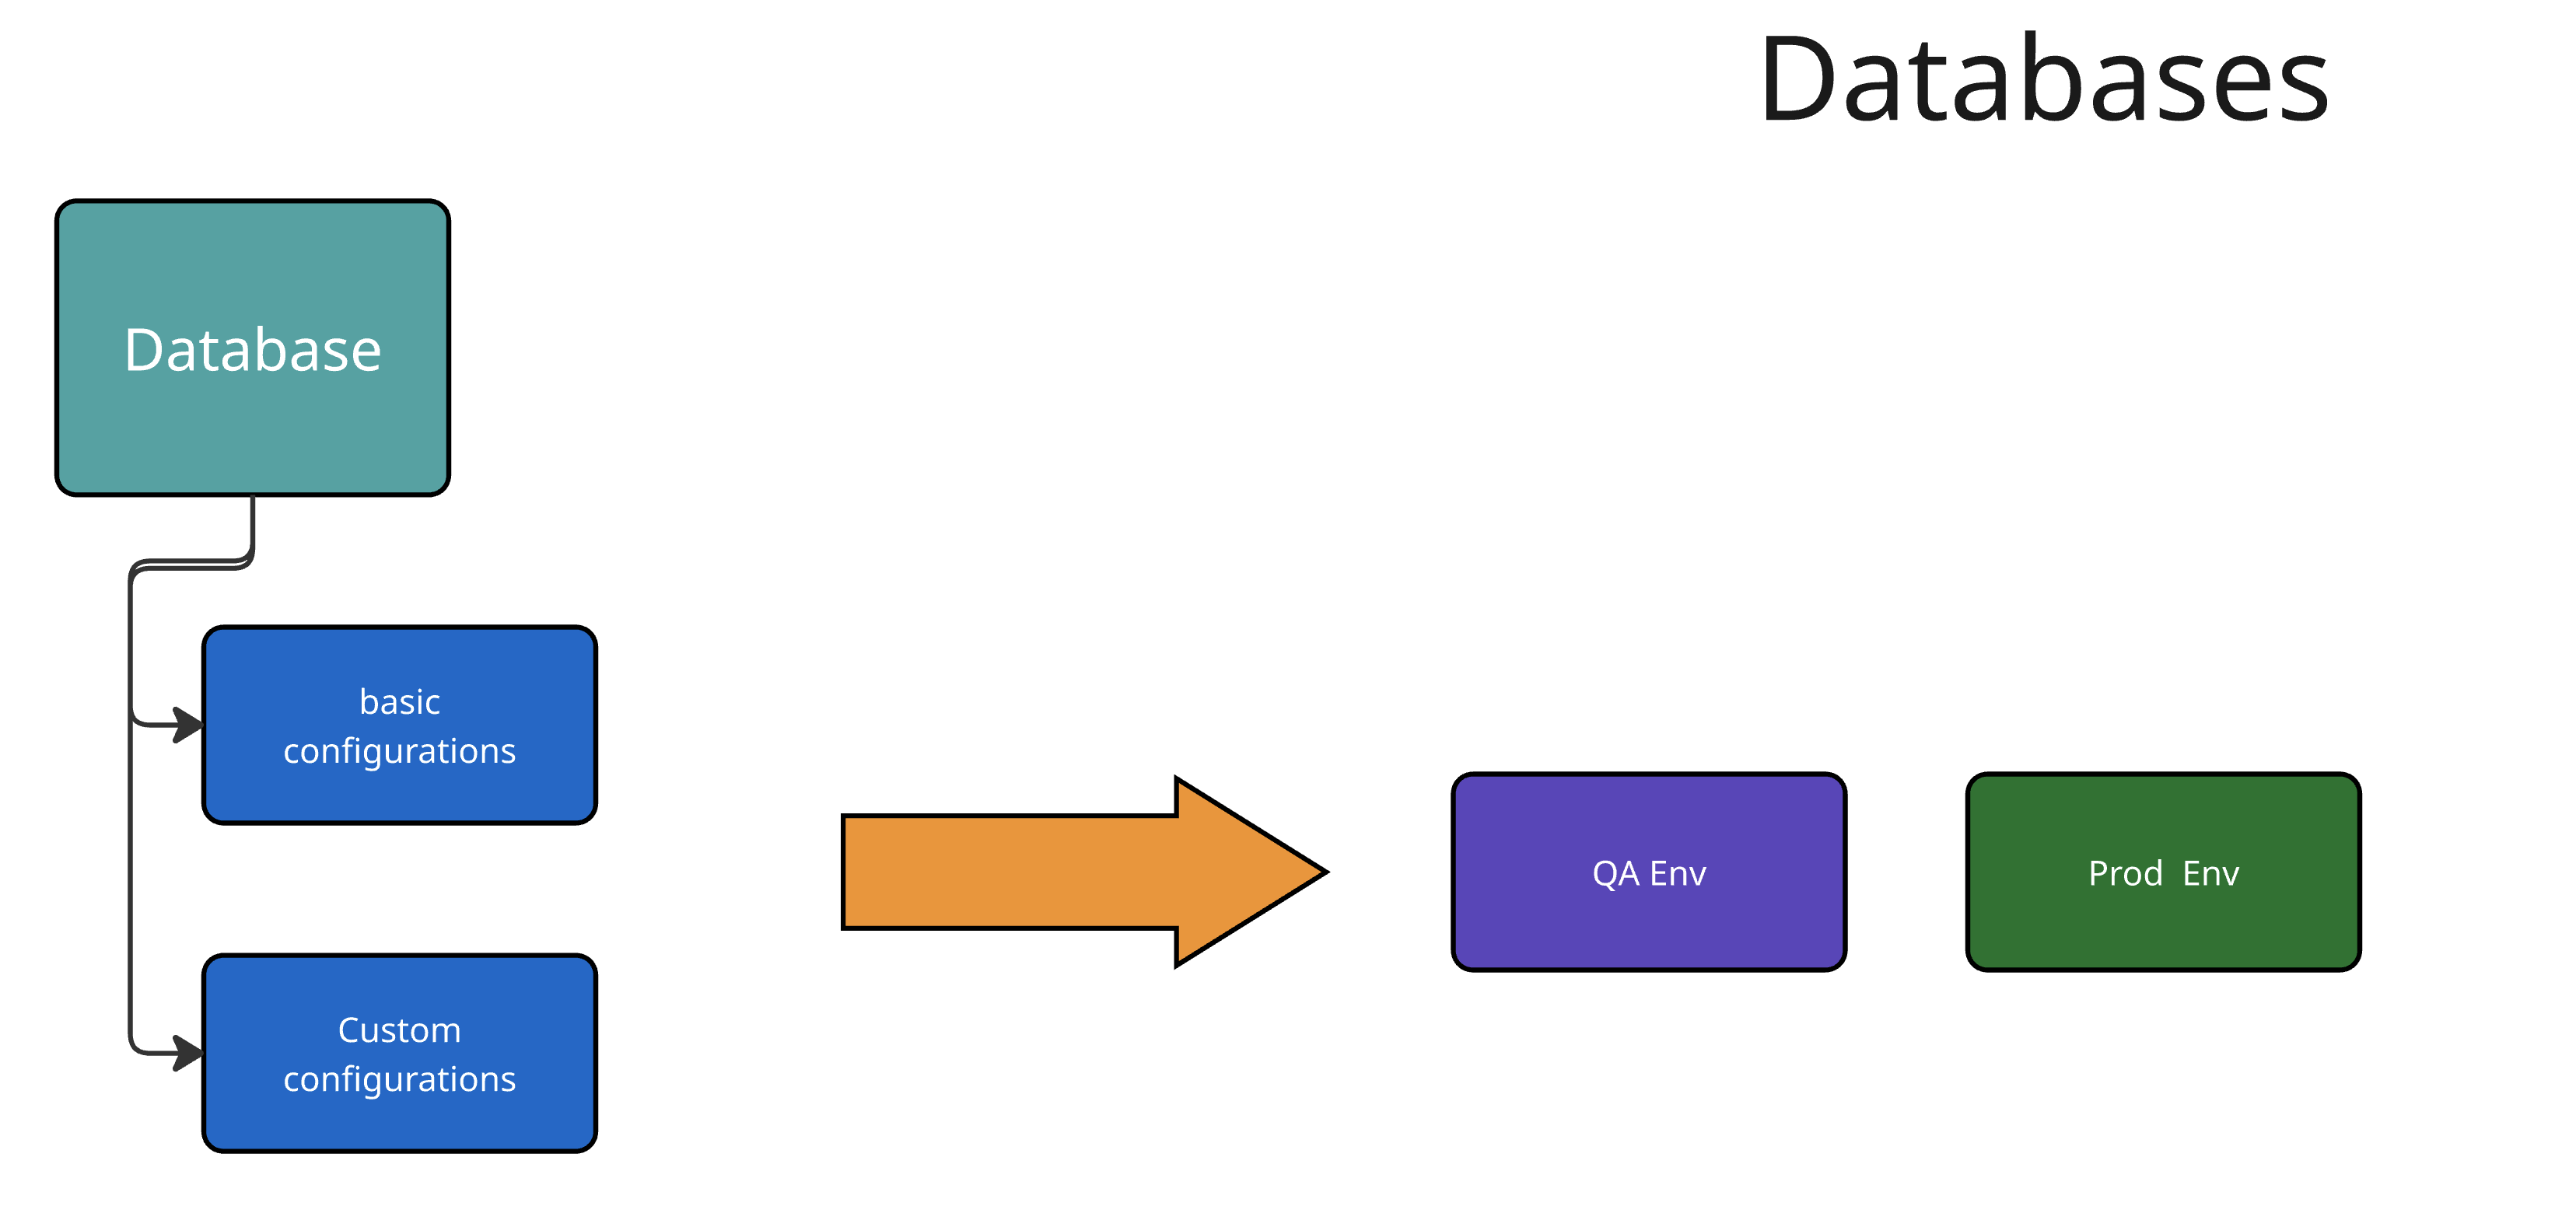
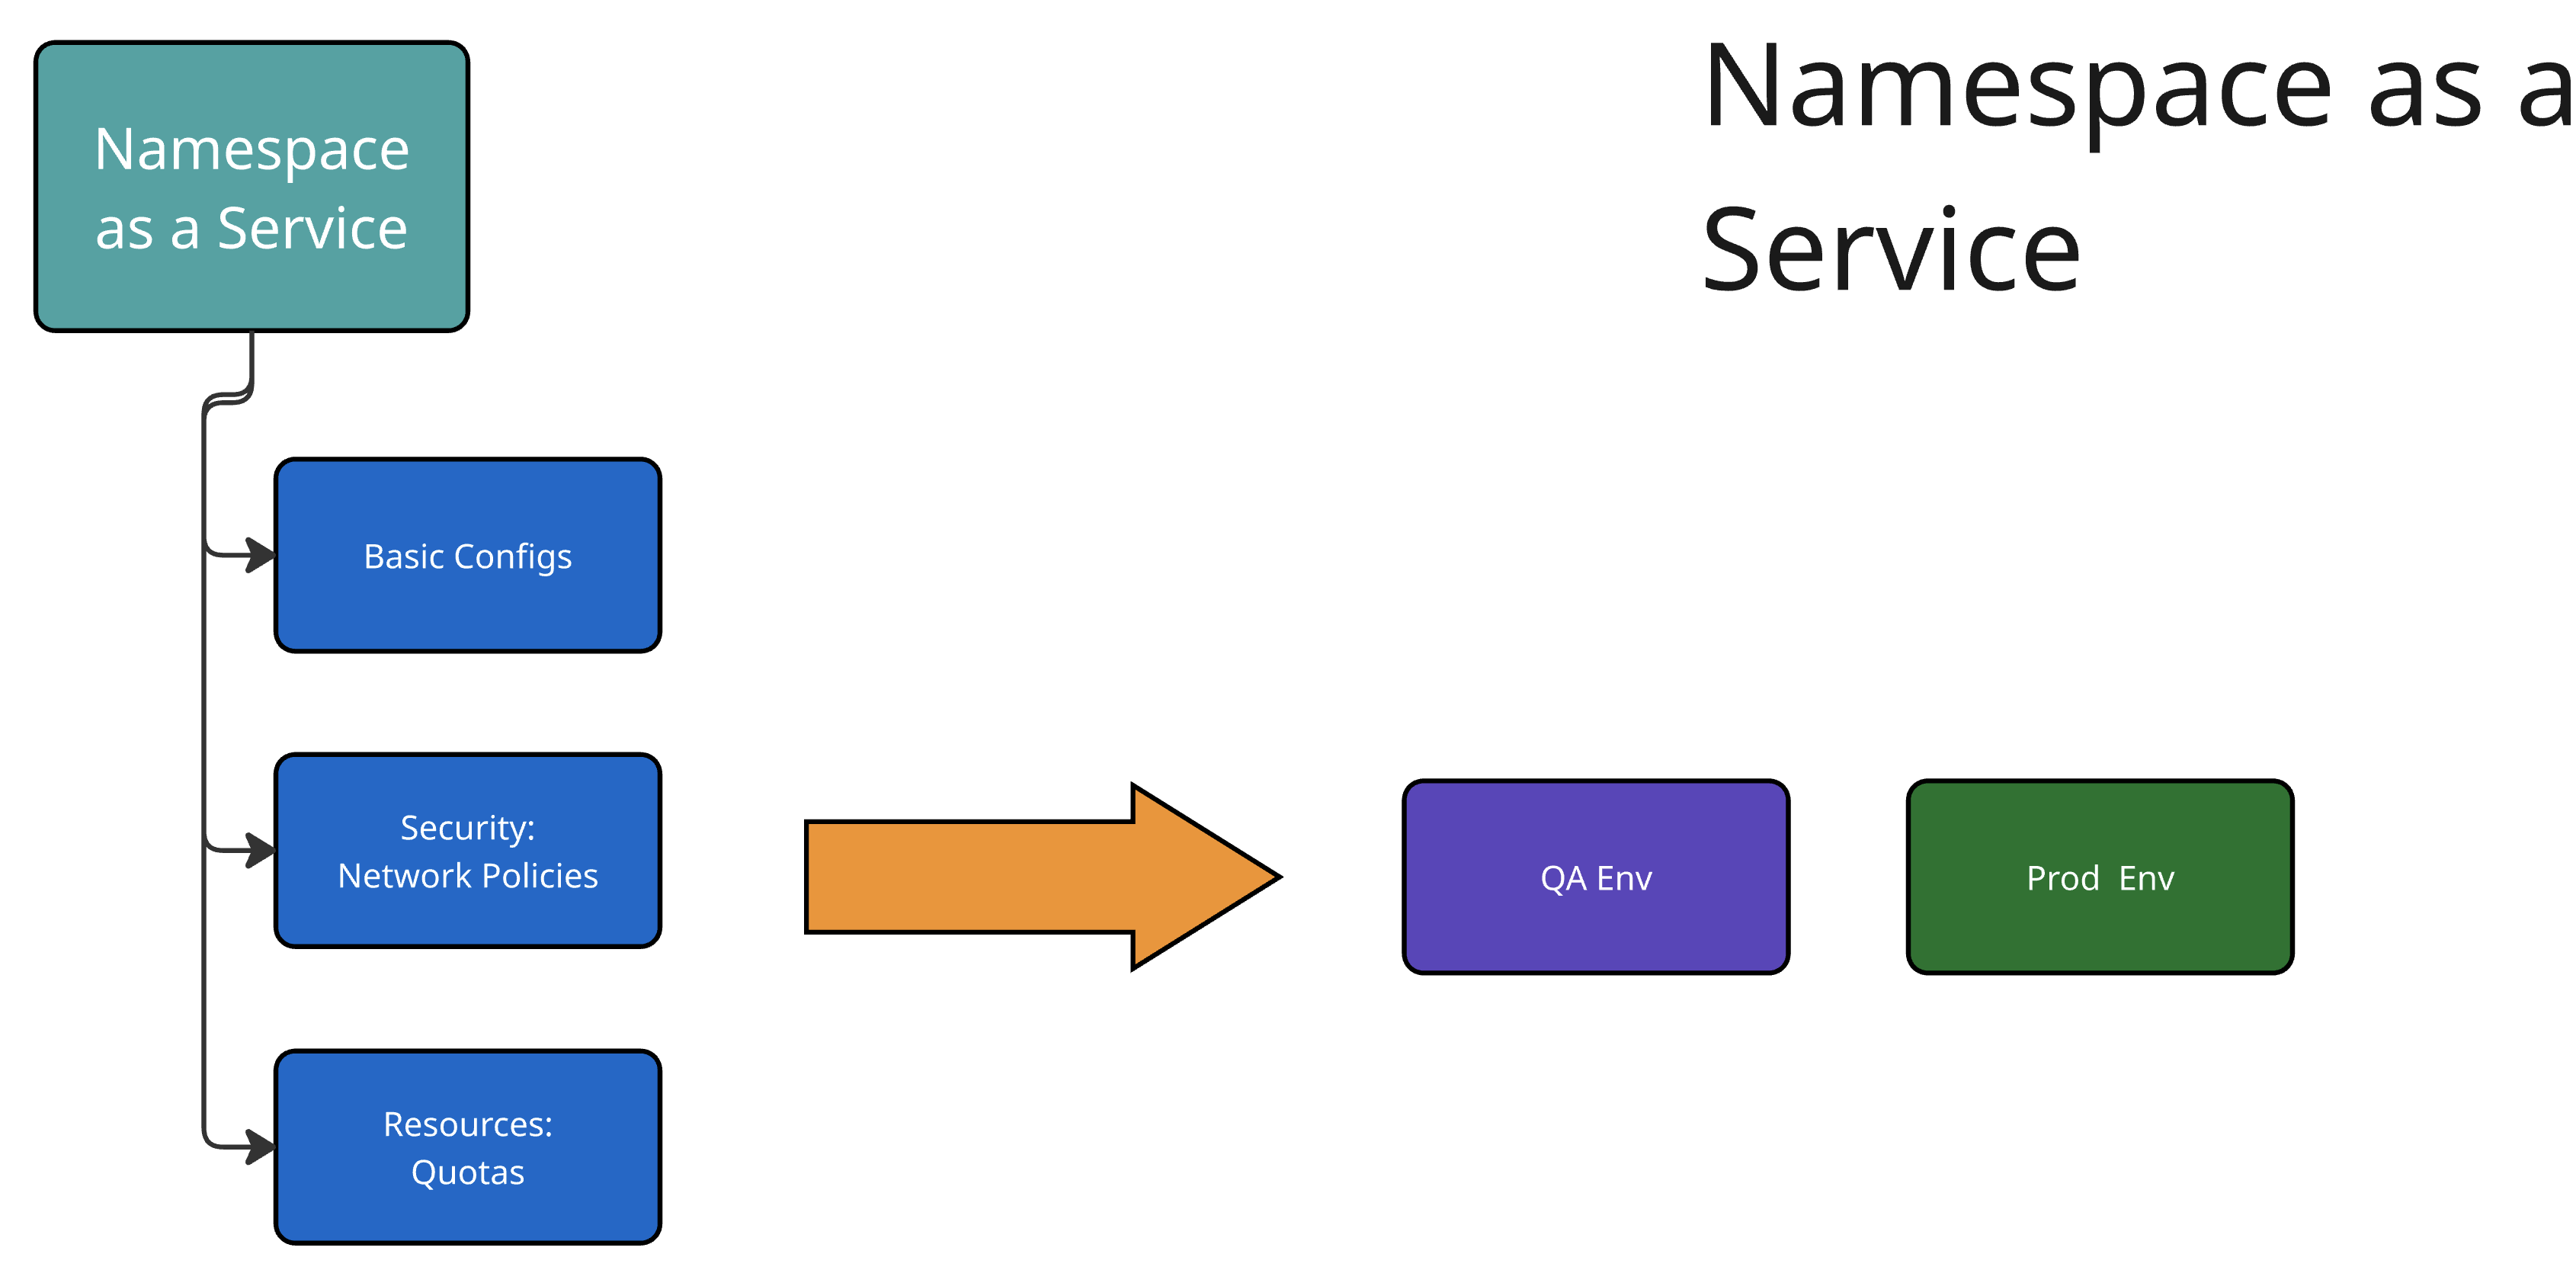
Technology Requirements: What specific technology is needed (database, VM, etc.), and how can it be customized and configured? This includes understanding basic versus custom configurations and how these meet end-user needs. Consider which information users will provide, default values, mandatory versus optional fields, and which data will be part of the manifests without user customization.
-
Example: Configuration options may include database type, origin (vendor or community), version, and specifications such as storage requirements.
-
-
Environment Requirements: Which environments are required for the components (development, QA, staging), including any customizations such as resource consumption that differ from the development environment. Additionally, determine who manages promotion to different environments and who has read or update access to this process.
-
Example: Production components may only be managed by the Platform Engineering team while remaining visible to the development team.
-
Let’s explore the configurations you will create during the hands-on lab, from building a database to providing namespace-as-a-service or virtual machines.
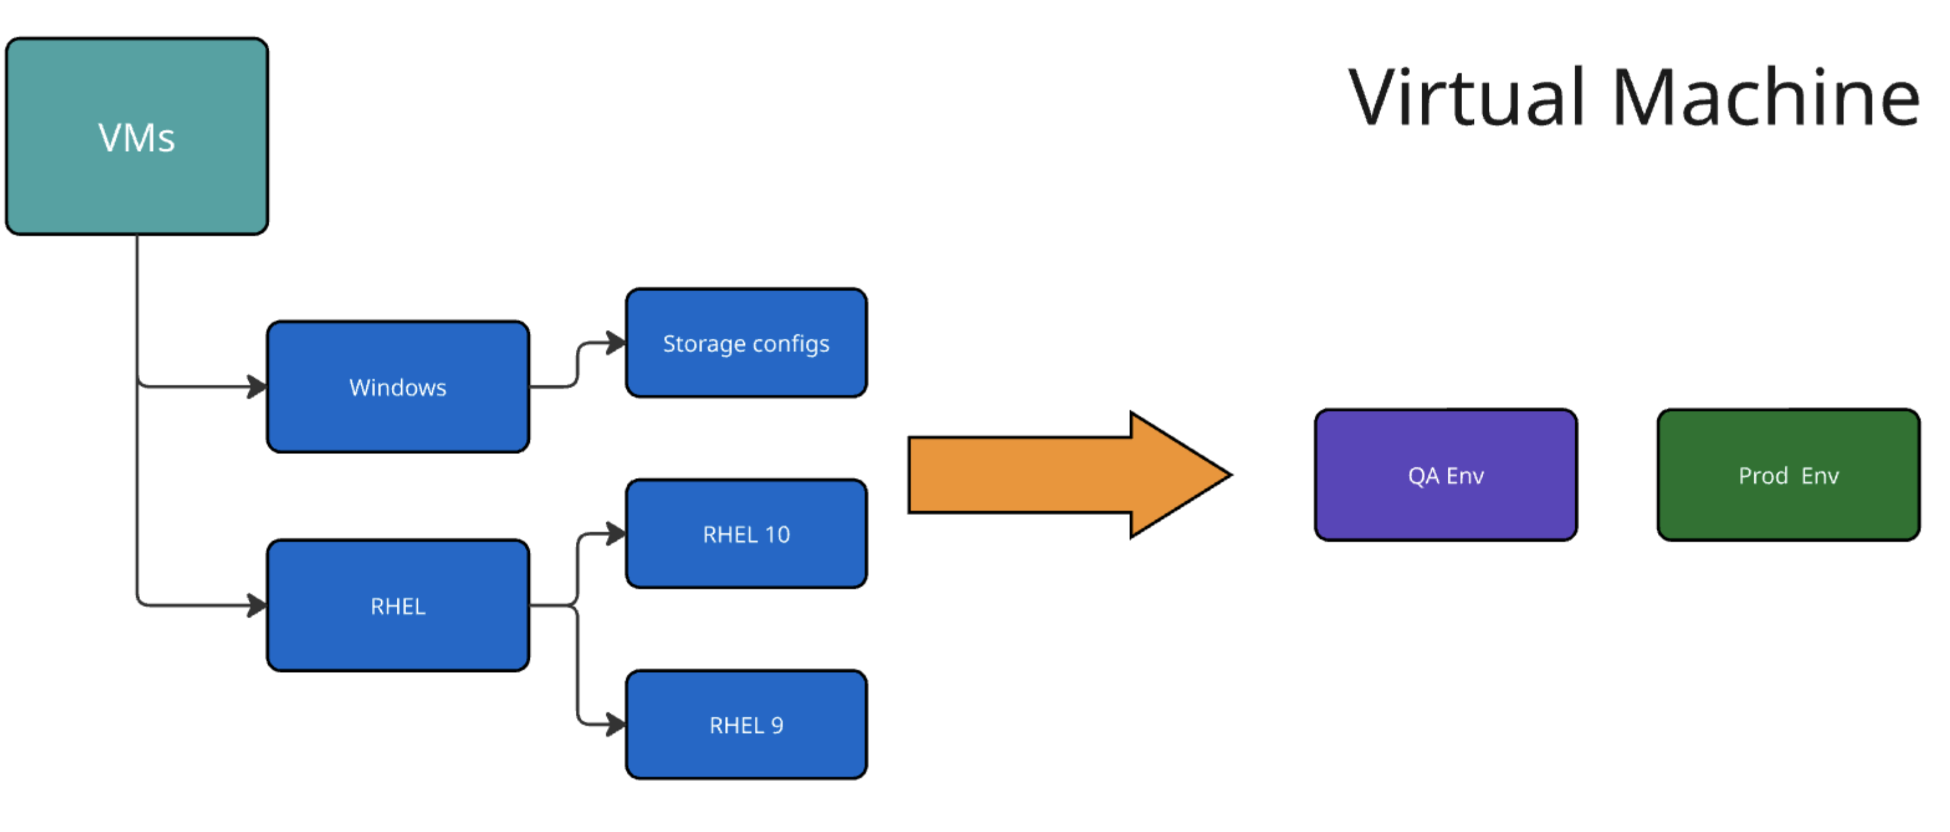
Building Virtual Machines (VMs)
Defining the Steps for VM Creation:
When creating a component from a template in Developer Hub, after the user clicks the Create button, a series of actions will occur as part of the VM creation process to build a virtual machine using OpenShift Virtualization and Red Hat Developer Hub. These steps are customizable and will be defined in the template.yaml file as part of the software templates.
Using OpenShift GitOps to Create VMs
The OpenShift GitOps controller will ensure that the desired state defined in the project and application are applied to the cluster. The OpenShift Virtualization operator will ensure that VMs are created, pods are running, and the VNC Console is accessible.
Building VM Helm Charts
Below, we detail the benefits of using Helm Charts in conjunction with virtual machines (VMs).
Using VMs from Instance Types
You can simplify virtual machine (VM) creation by using instance types, which provide an easy way to define your VM’s manifest. You can customize the Helm Charts extensively and use specific configurations to build your VM.
Your Helm chart files can represent all virtual machine definitions. For this use case, the Helm charts include:
-
_template/helpers.tpl: Holds variables such as labels and annotations to be used in the manifest files. -
template/vm.yaml: a VirtualMachine object representing the instance of the virtual machine that will be created in OpenShift. -
chart.yaml: Contains the Chart’s definition, such as name and version. -
values.yaml: Variables from thetemplate.yamlfile provided by RHDH.
The steps in the template.yaml file
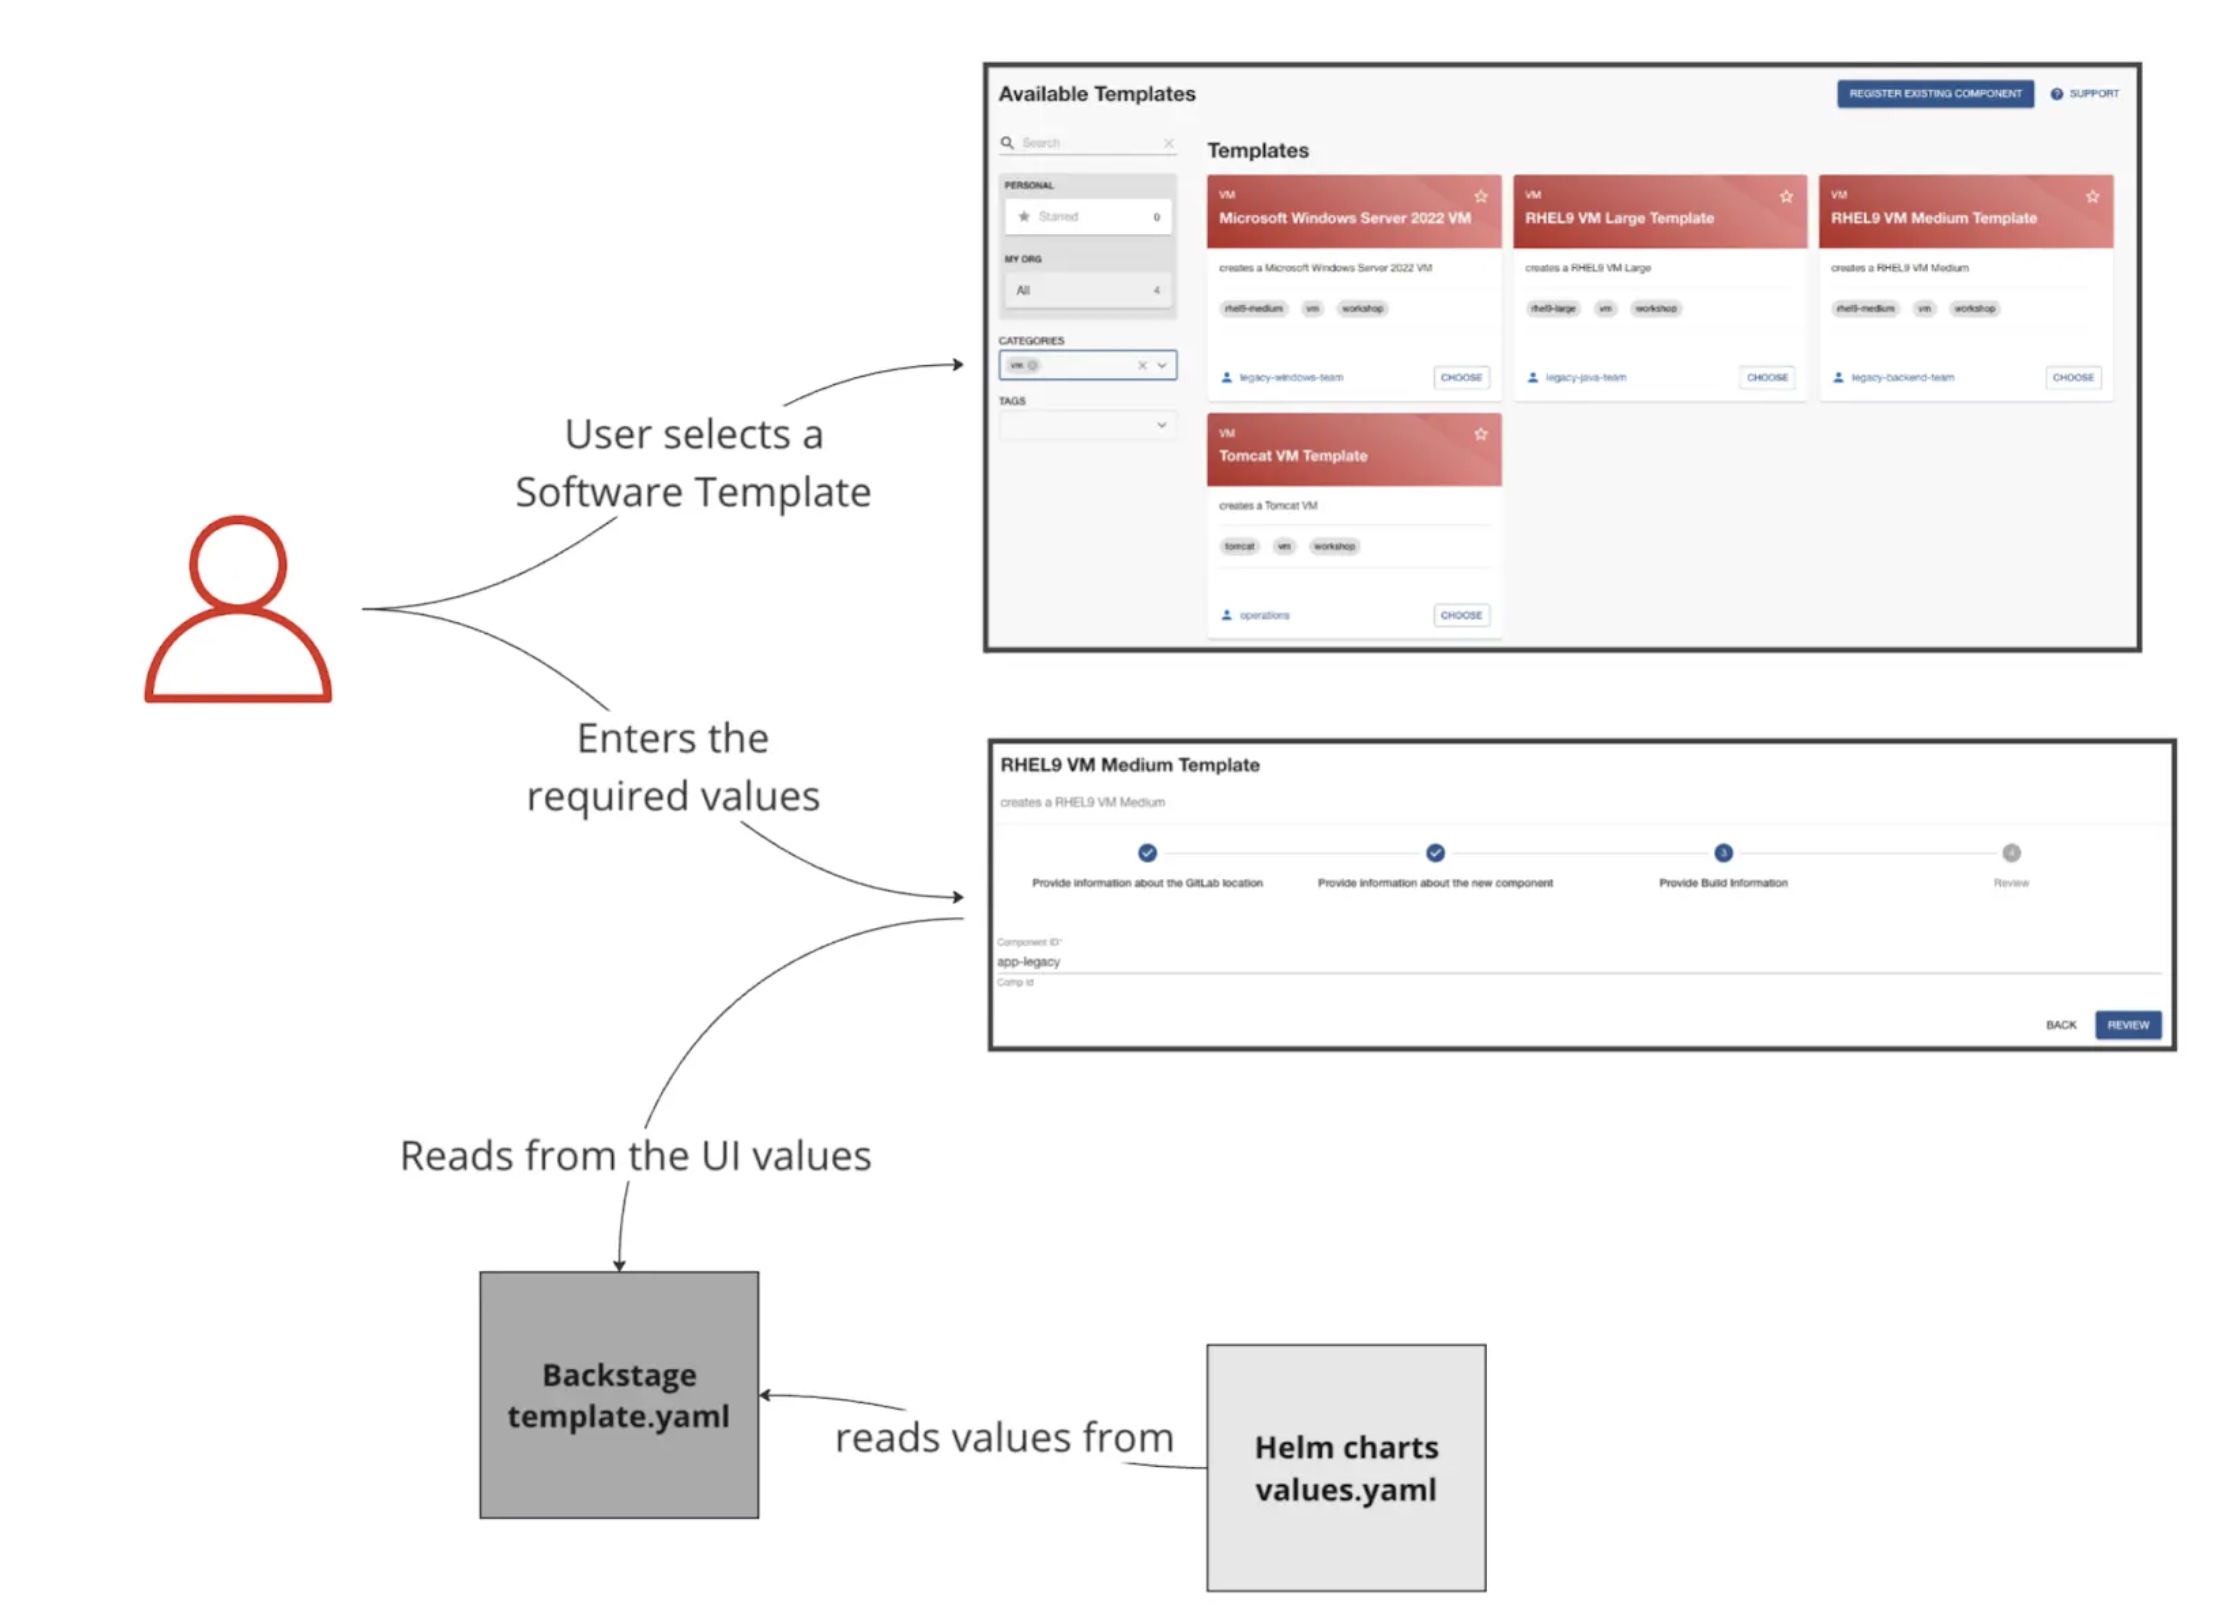
Step 1: Generating the Source Code Component
Developer Hub reads the parameters from the UI and software template definitions:
action: fetch:templateStep 2: Publishing to Source Code Repository
The system clones the repository with new source code representing the VM source code. In this case, we only have one file: the catalog-info.yaml:
action: publish:gitlabStep 3: Registering the Source Code Component
Using the catalog-info.yaml file, Developer Hub registers this component, making it available in the Developer Hub UI:
action: catalog:registerStep 4: Generating the GitOps Deployment Resources and Artifacts
The system builds the GitOps resource files using the software templates defined in the manifest folder to create the manifests in a new GitOps repository containing the values required to build the VM:
action: fetch:templateStep 5: Publishing the GitOps Deployment Resource Repository
The templated GitOps resource files are published to the GitLab repository:
action: publish:gitlabStep 6: Creating Argo CD Resources
Argo CD creates a GitOps application based on the source repository published in the previous step:
action: argocd:create-resources