Configure AI Tools in Red Hat OpenShift Dev Spaces (Bonus Lab)
Introduction
This lab explores how Red Hat Advanced Developer Suite (RHADS) integrates with other products and third-party tools to bring AI into developers' daily activities. It also shows how developer tools like Red Hat OpenShift Dev Spaces provide opportunities to adopt AI practices.
Objectives
This lab showcases how to configure an AI assistant and expand its capabilities by configuring a Tavily MCP server.
Let’s get started.
Scenario
You are part of the Python AI Development team. Your team has already built the AI agent; now it is your time to learn about this implementation.
Getting started
-
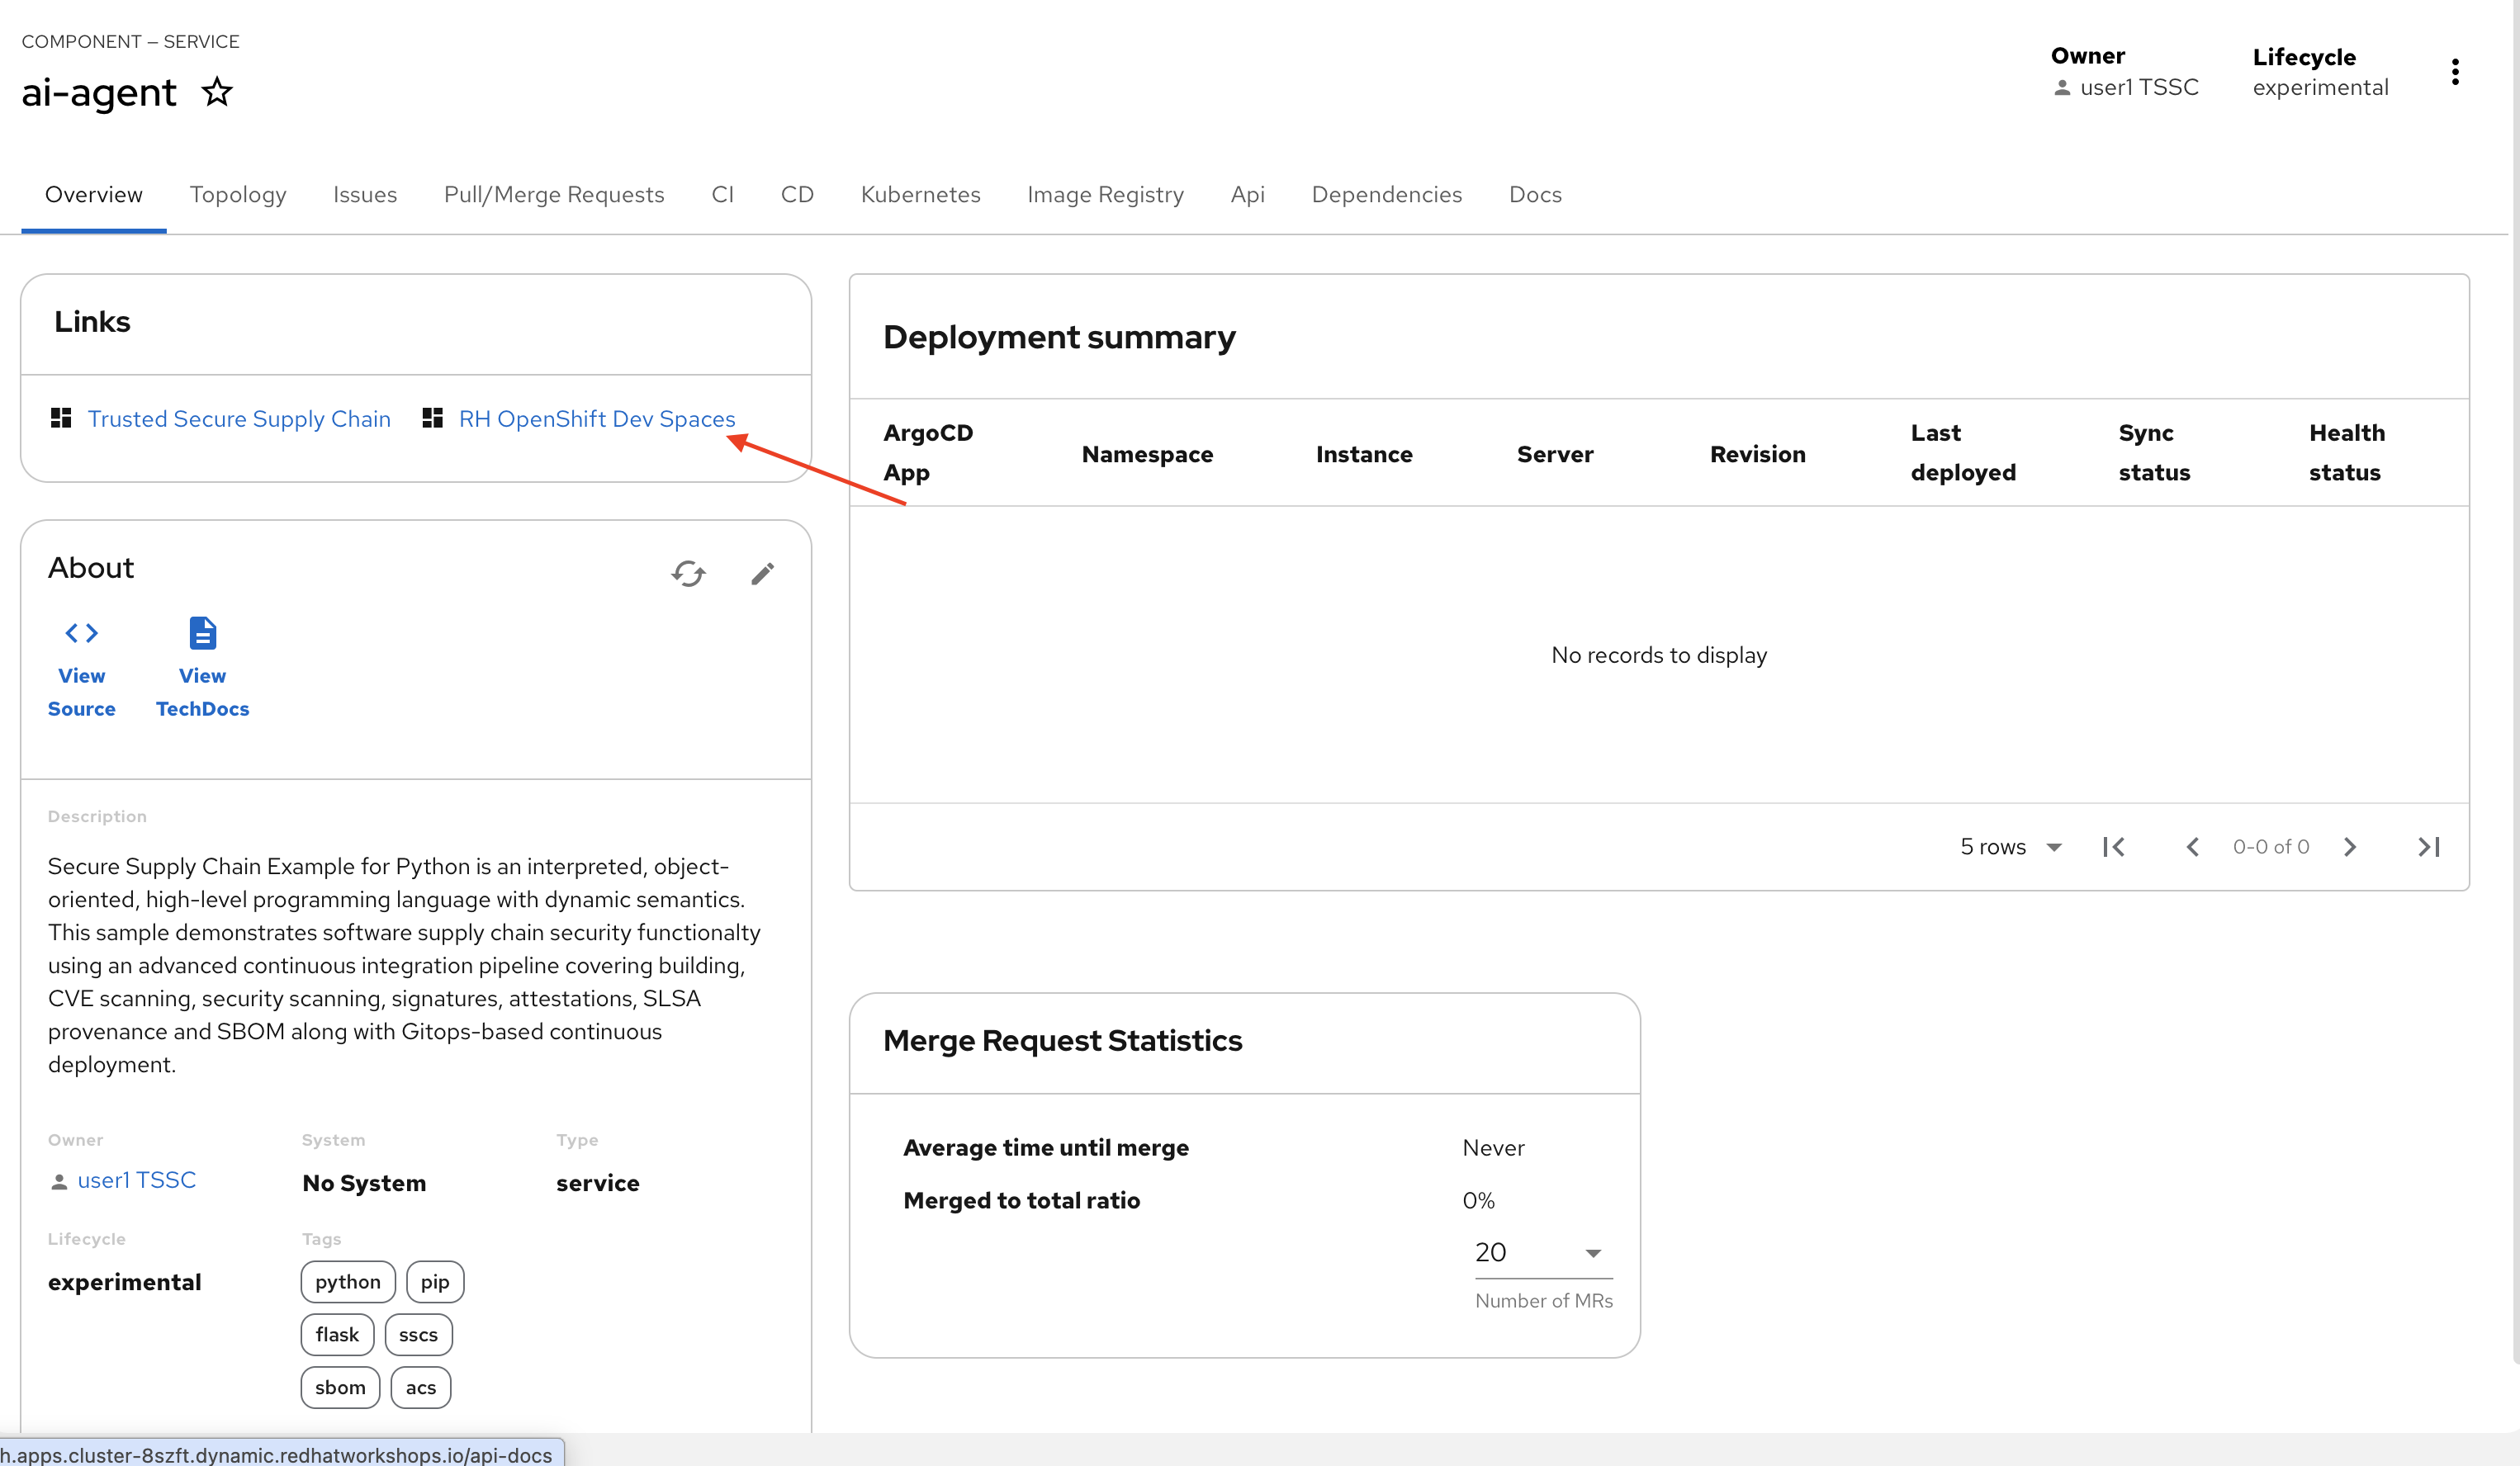
Access Red Hat OpenShift Dev Spaces from the component already created in Red Hat Developer Hub:
-
Go back to {rhdh_url}/catalog/default/component/ai-agent[Red Hat Developer Hub UI^]
-
Log in with your user credentials:
-
Username: {rhdh_user}
-
Password: {rhdh_user_password}
-
-
-
Next, click the ai-agent component.
-
From the component’s overview, click the Red Hat OpenShift Dev Spaces link.
-
Log in with your user credentials:
-
Username: {devspaces_user}
-
Password: {devspaces_user_password}
-
Configure the AI Assistant in Red Hat OpenShift Dev Spaces
We want to use an AI assistant within OpenShift Dev Spaces. For this lab, we’ll use Continue. Organizations might use others, such as Claude or Microsoft Copilot. In many organizations, developers use AI Assistants to increase productivity. Learning about these tools is key to understanding how AI can be leveraged within Red Hat products.
-
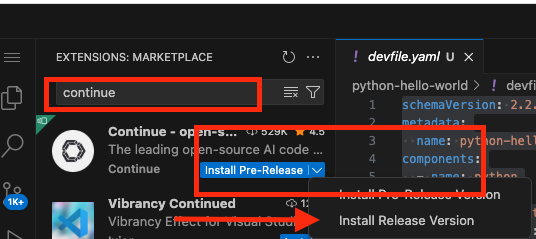
In Red Hat OpenShift Dev Spaces, click Extensions.

-
Search for the continue extension and select Install Release version.
-
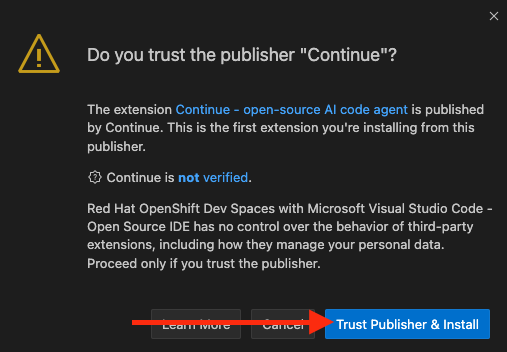
Click the Trust the Publisher and Install button.
-
After a successful installation, you will see a screen similar to this:

Configure the LLM in the AI Assistant
-
Next, click the continue icon.
![]()
-
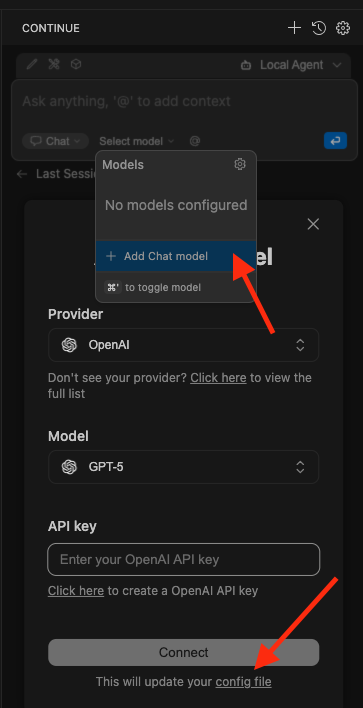
Click the Add Chat model option, then click config file.
-
A new file named config.yaml will be created.
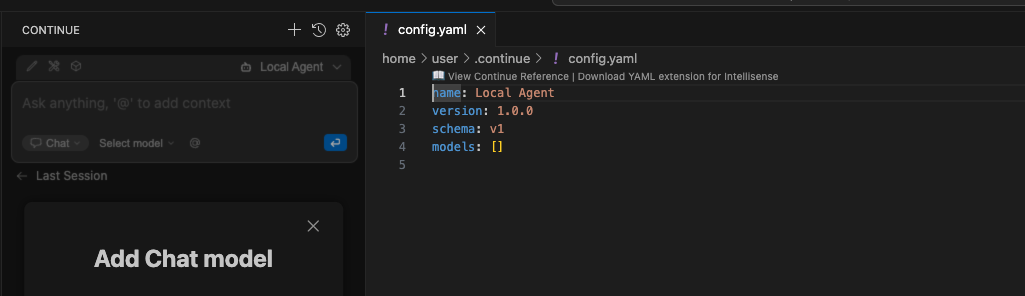
-
Copy the following content and paste it, replacing the whole current content:
-
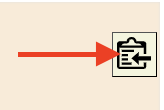
Copy the provided content by clicking the icon:
name: Local Assistant version: 1.0.0 schema: v1 models: - name: llama-3-2-3b provider: openai model: llama-3-2-3b apiBase: apiKey: "" roles: - chat - edit - apply tabAutocompleteModel: title: RamaLama (AutoComplete) provider: custom model: default allowAnonymousTelemetry: false context: - provider: code - provider: docs - provider: diff - provider: terminal - provider: problems - provider: folder - provider: codebase -
If needed, verify the solution: config.yaml AI assistant config file
-
-
Paste it into the
config.yamlfile created by continue.
Next, you will add the Model’s apiBase and apiKey from the Internal MaaS Demo from the AI BU.
Get your API key for the self-hosted Model
Configuring an AI assistant requires an LLM. Organizations might use their own self-hosted models or remote ones. For this lab, we will use the Model as a Service portal to access an LLM.
-
Access the URL and sign in with your Red Hat account: Maas website
Note: The Maas website is not an official Red Hat service. It is for Red Hat associates' internal demo purposes only, provided 'as-is' without support or SLA. The intended purpose is to test the connectivity of Red Hat products to models that customers may use.
-
Click Sign in.

-
Click Authenticate with RH SSO.
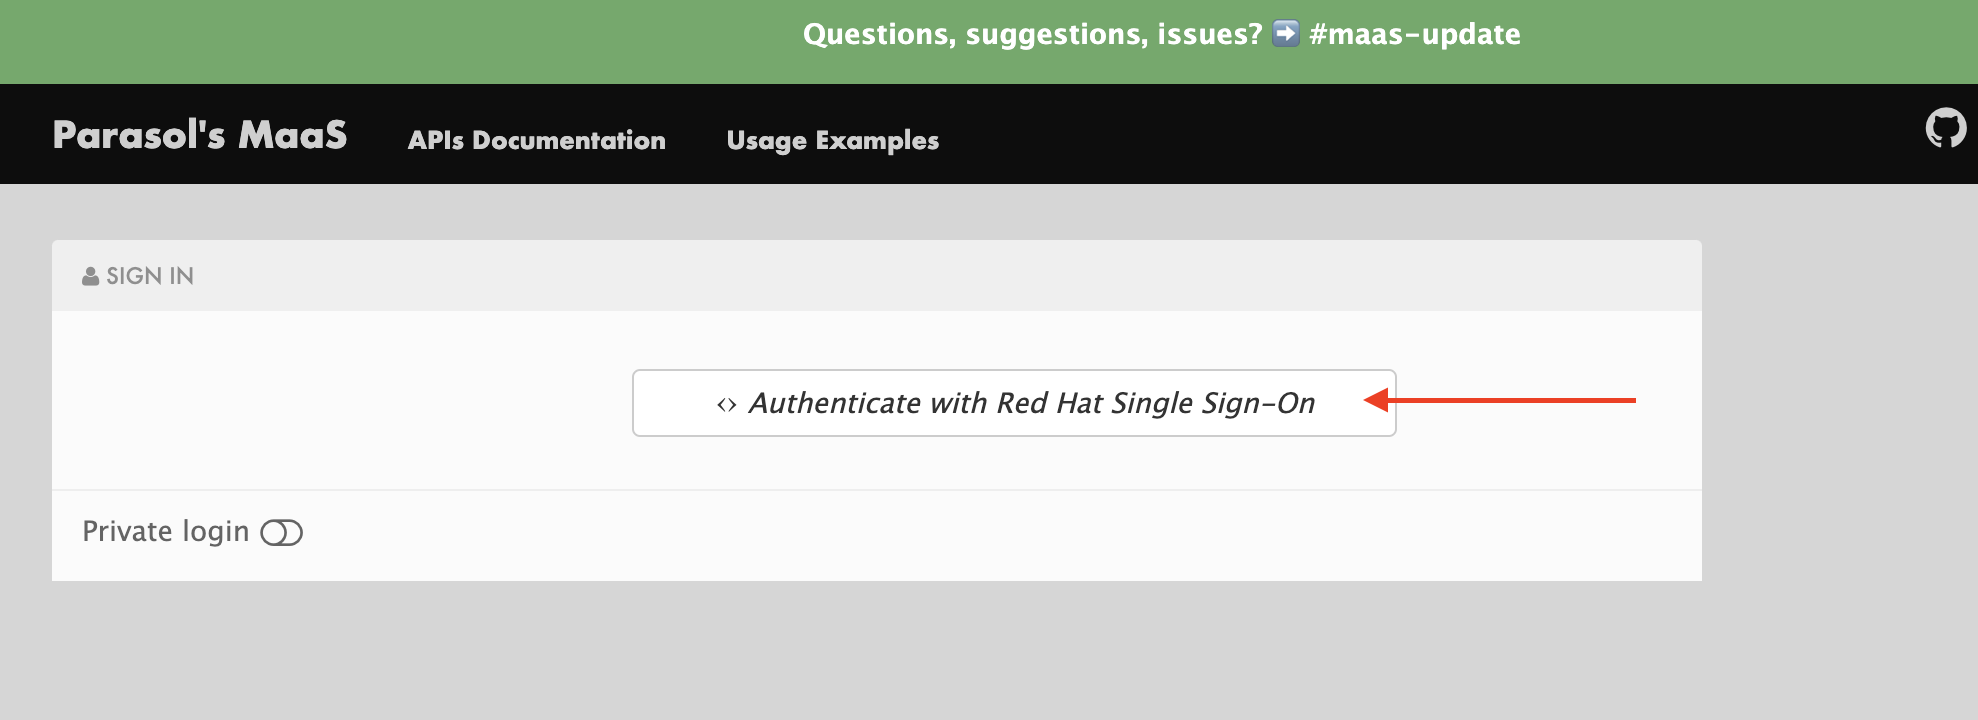
-
Click Google to sign in to RHOAI, where the model is deployed with your account.

-
Click applications.
-
Click the llama-3-2-3b model.

-
Copy the API Key and paste it into the config.yaml file’s apiKey: "".

-
Copy the Endpoint URL and paste it into the config.yaml file’s apiBase: and add /v1 to the end of the URL.
-
Save the file and close the Config update message.

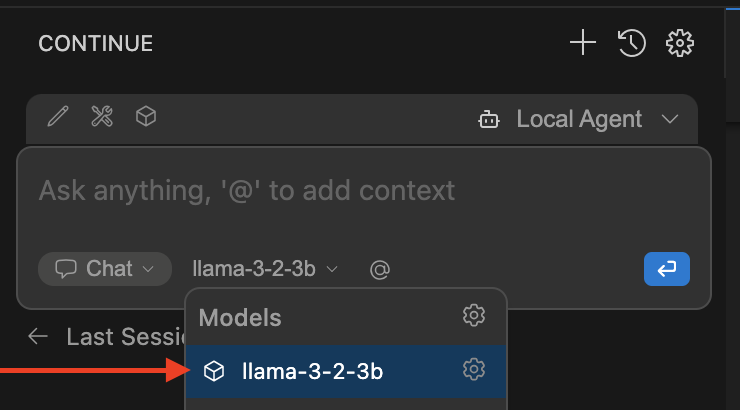
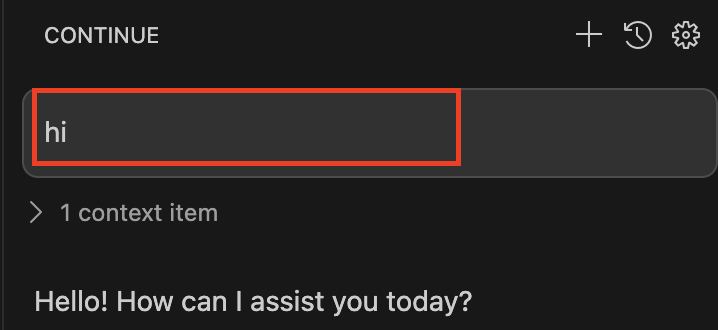
Test the AI Assistant
-
Click the recently added model llama-3-2-3b, to add it to the Continue chat:
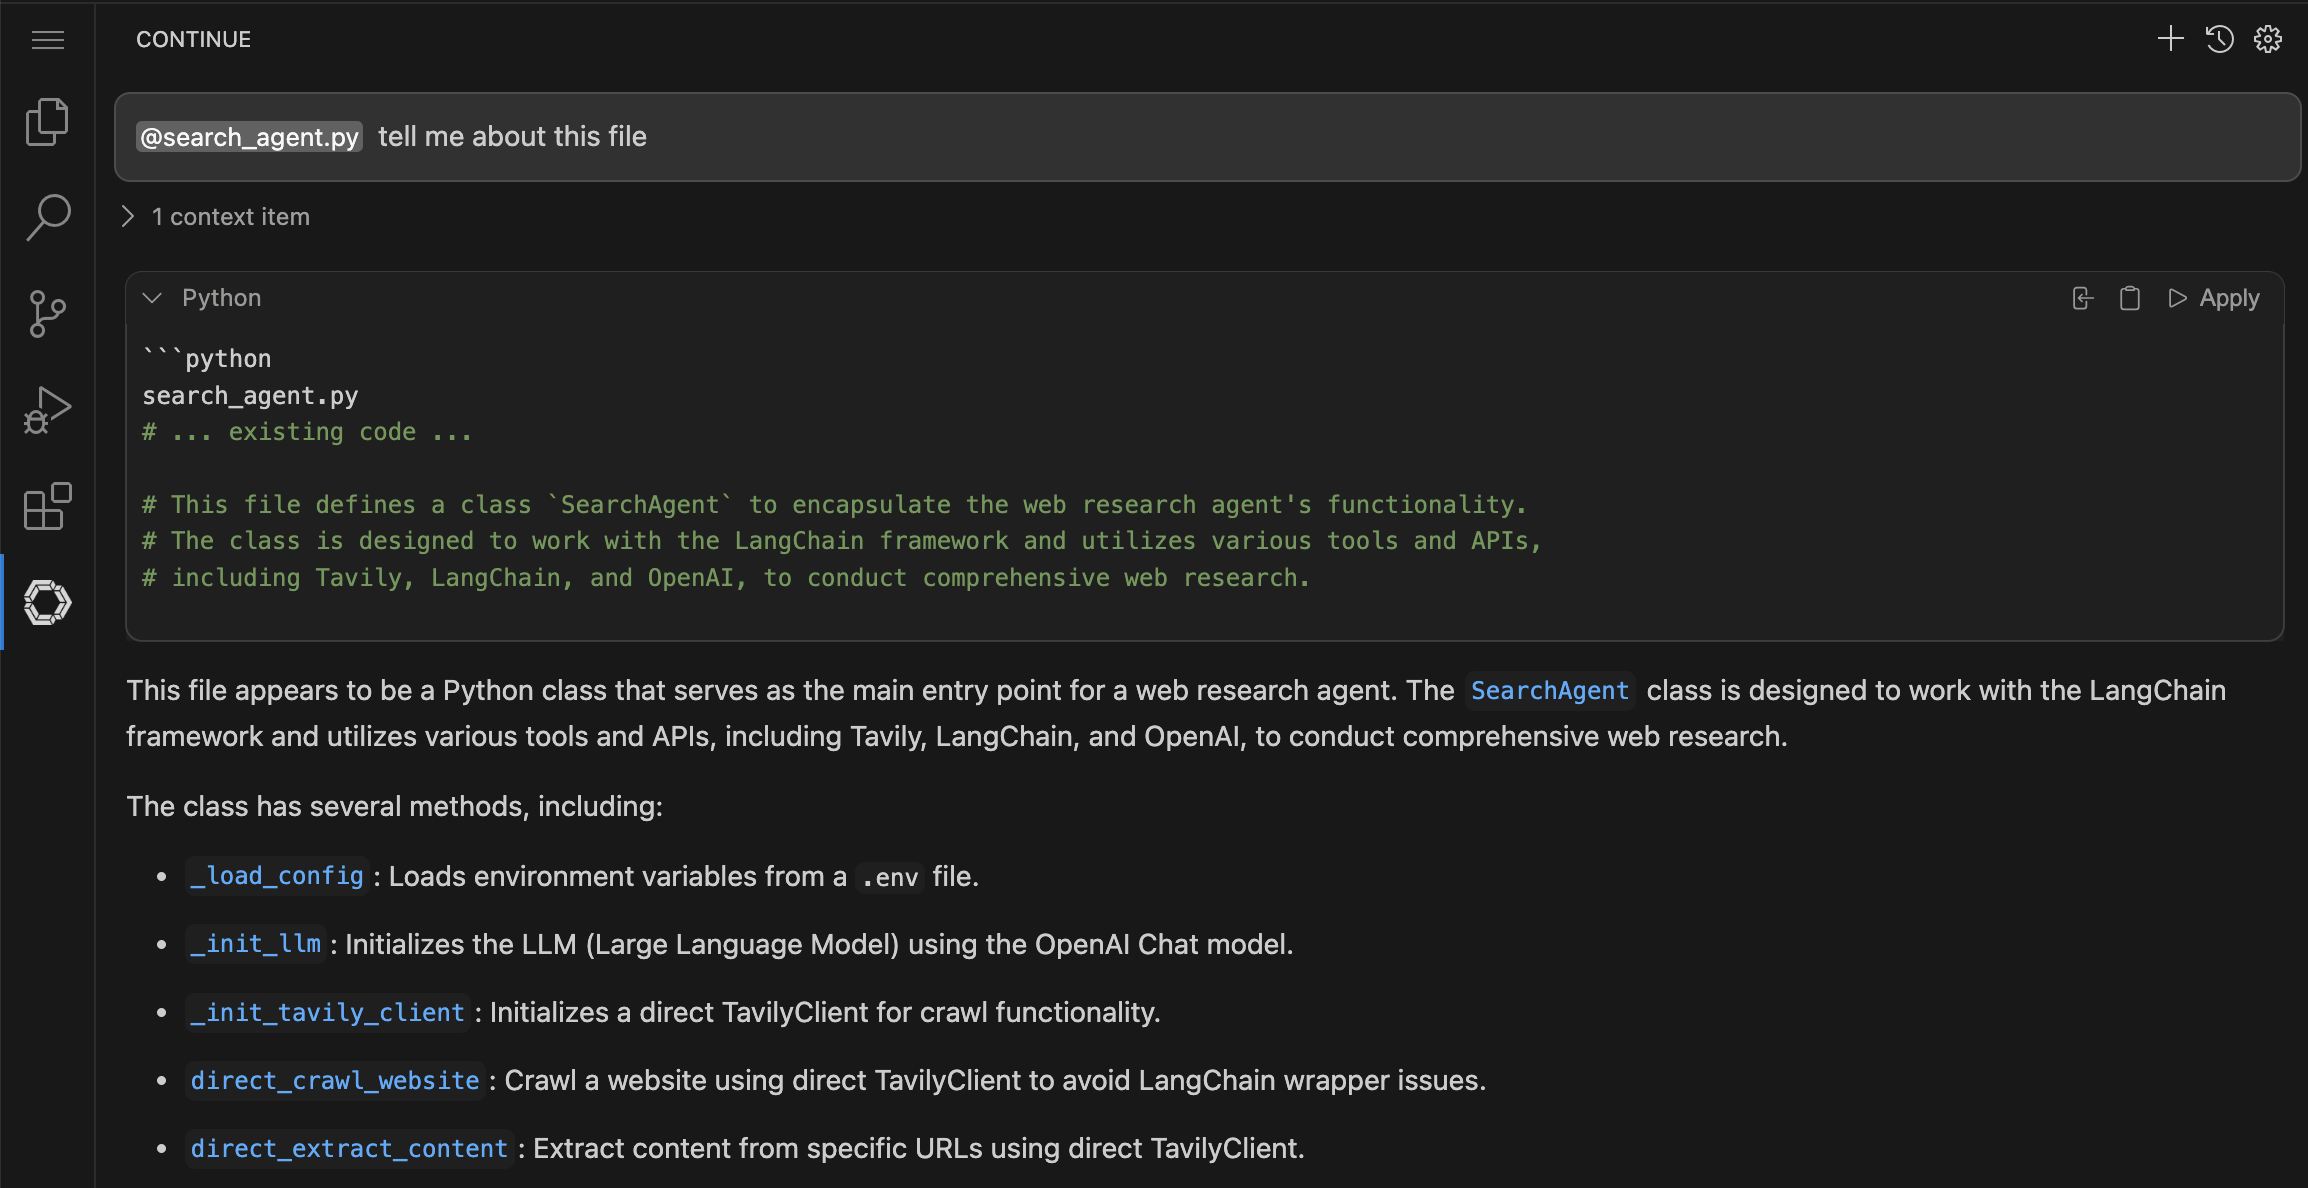
Learn about the search_agent.py file
Learn about the implementation. Let’s start with the search_agent.py file.
@search_agent.py tell me about this fileNote: ensure you add @search_agent.py at the beginning of the prompt:
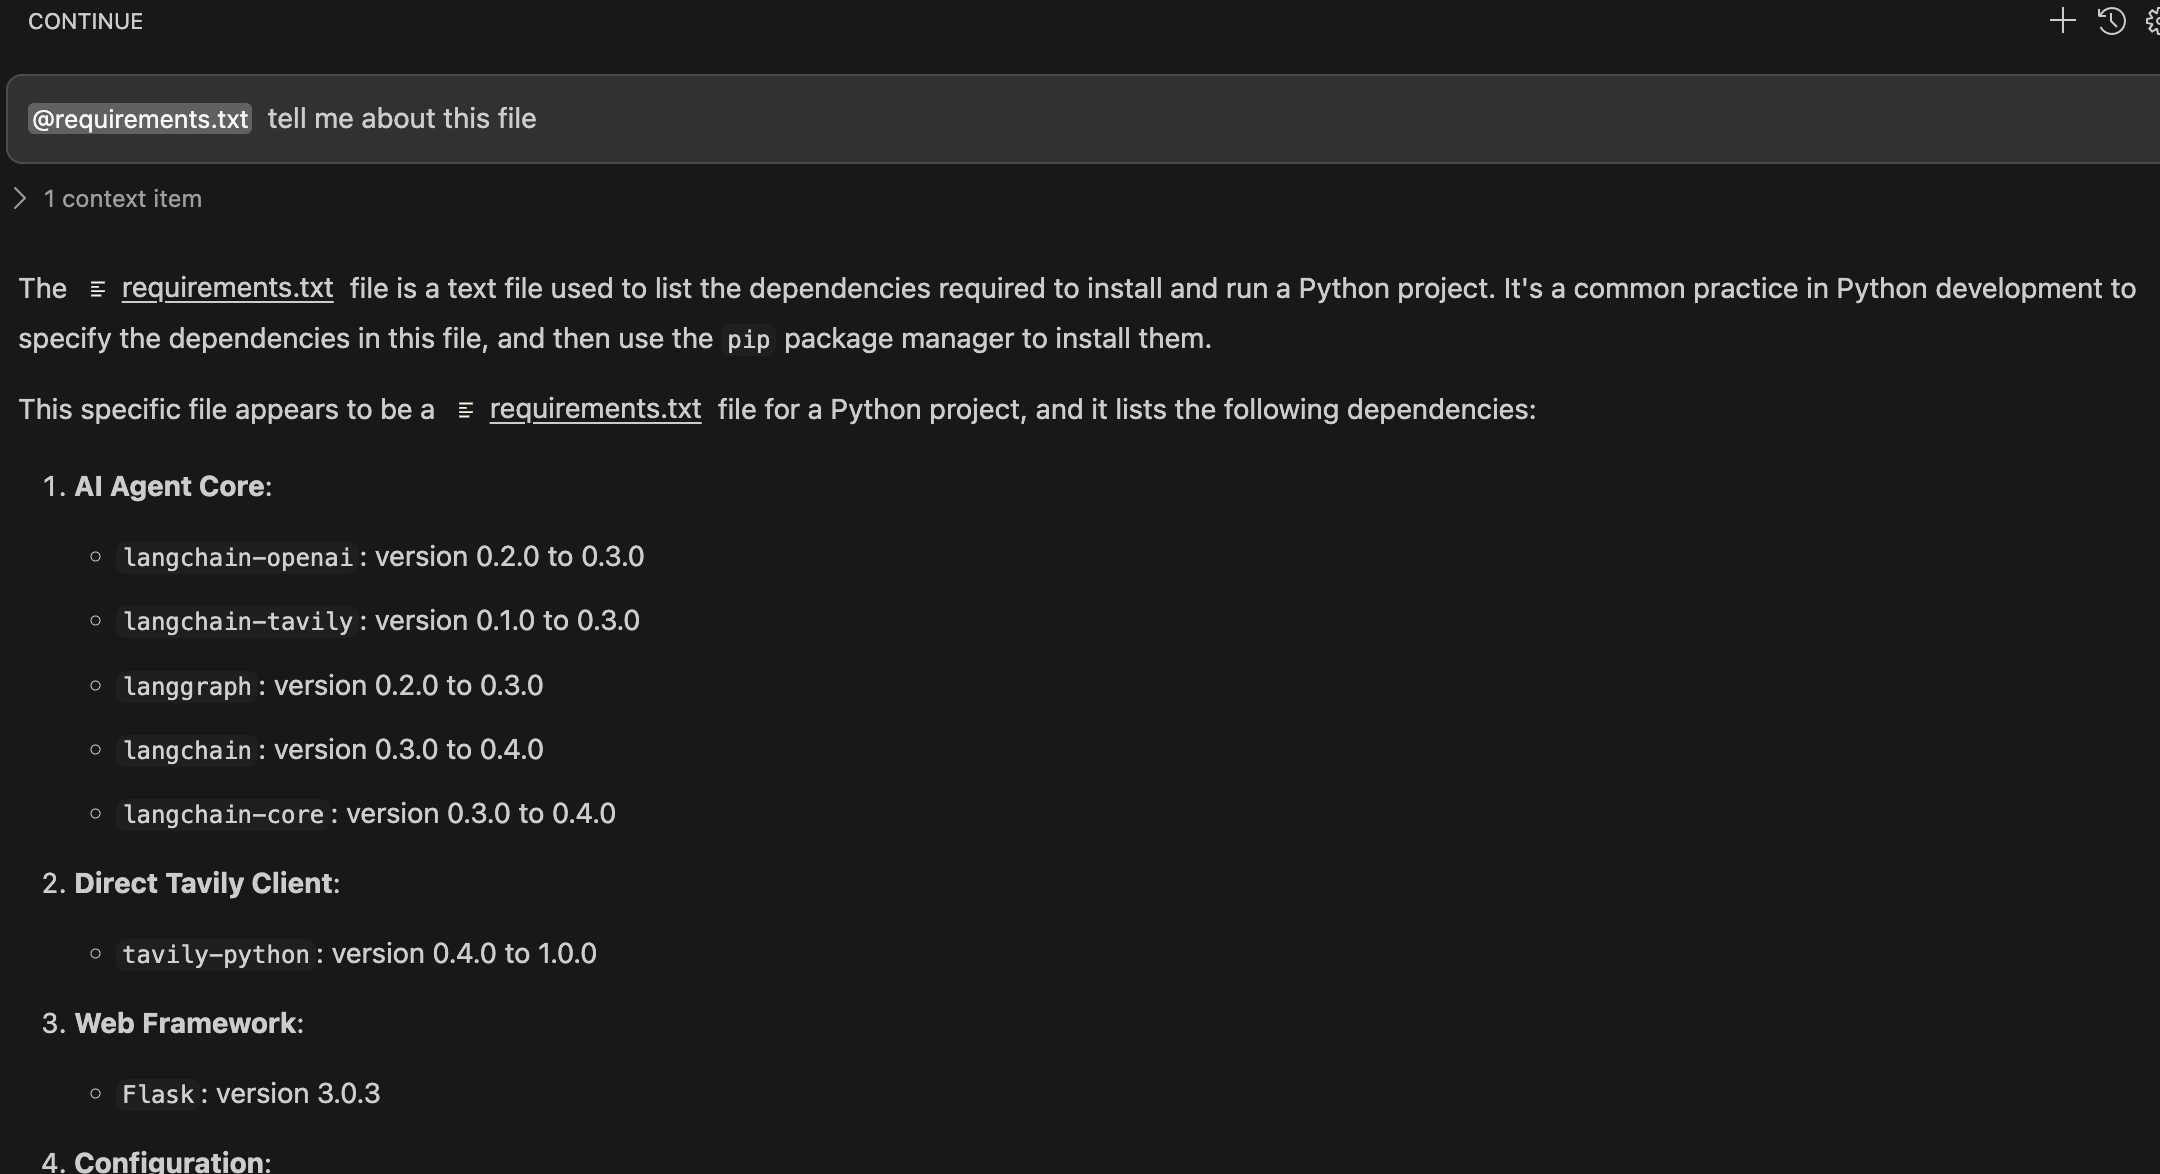
Learn about the requirements.txt file
@requirements.txt tell me about this fileNote: ensure you add @requirements.txt at the beginning of the prompt:
Congratulations, you have successfully configured an AI Assistant in Red Hat OpenShift Dev Spaces using a self-hosted LLM and learned about the AI Agent implementation.
Configure an MCP server in the AI Assistant
The AI assistant will use Tavily for tools, such as Web Search. We want to include the Tavily MCP server in our Development environment to learn about the AI agent development.
-
Click the Continue chat and click the tools icon:

-
In the tools window, click the plus icon to configure the MCP server.
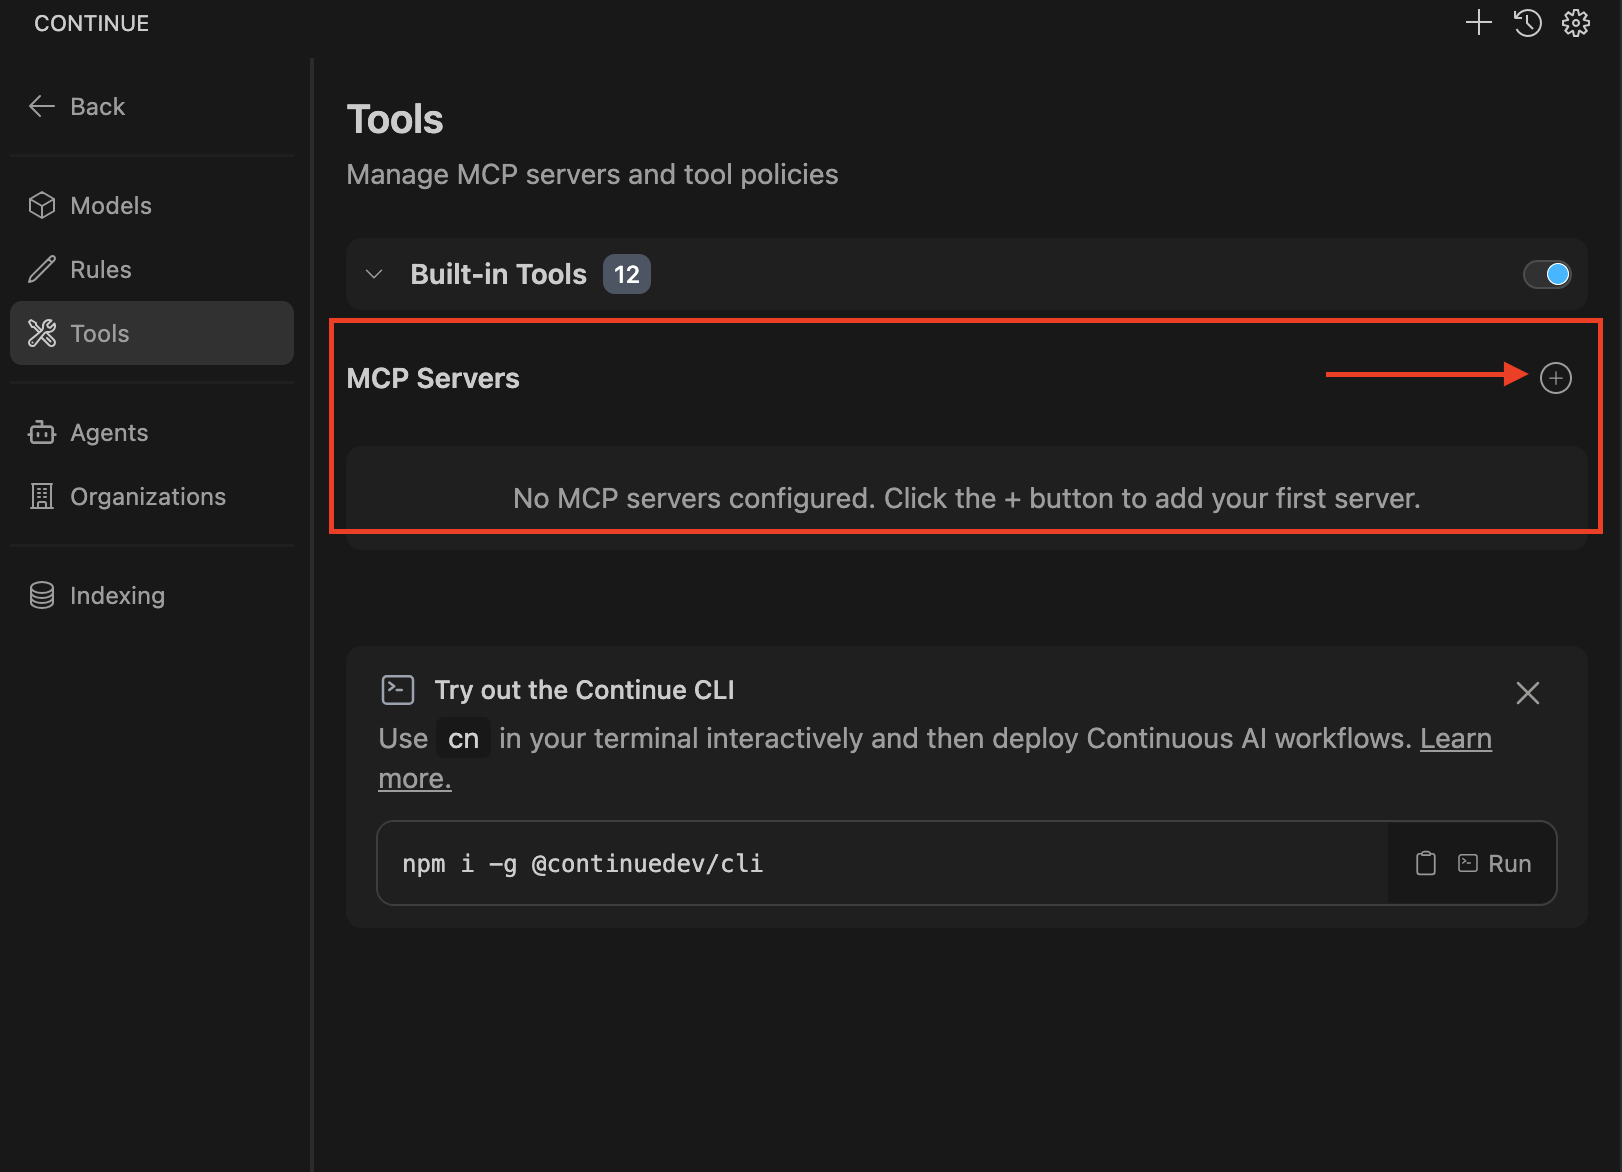
-
A new file named new-mcp-server.yaml will be created.
-
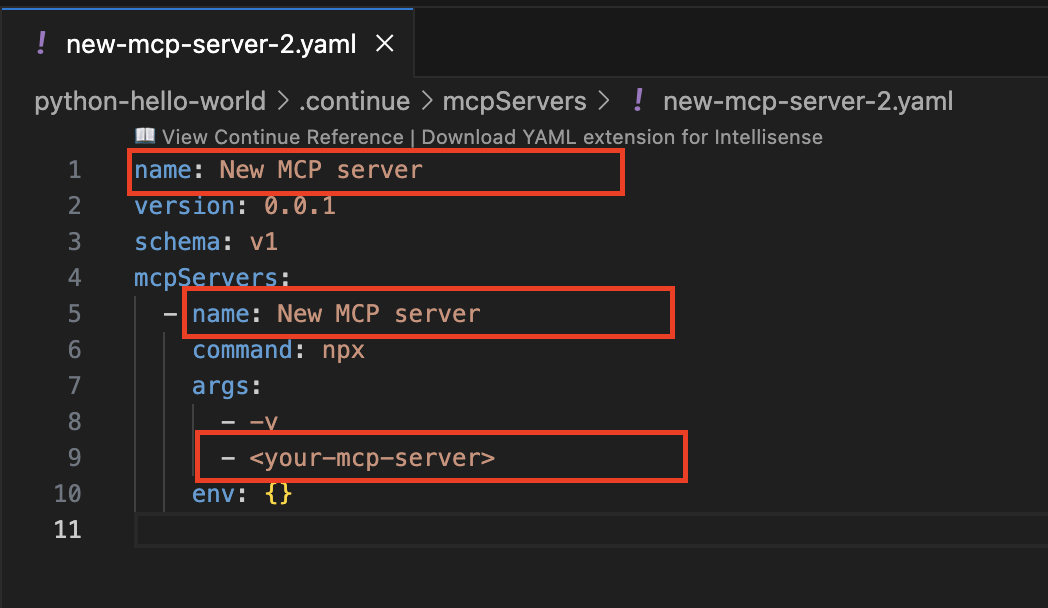
Copy the following content and paste it, replacing the whole current content:
-
Copy the provided content by clicking on the icon:
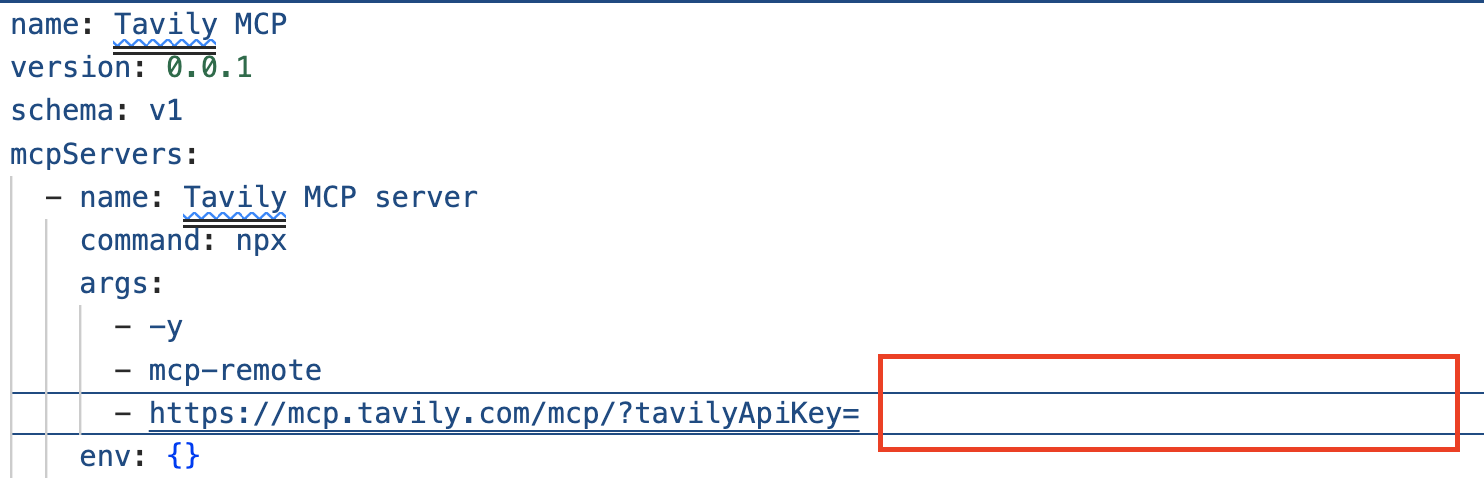
name: Tavily MCP
version: 0.0.1
schema: v1
mcpServers:
  - name: Tavily MCP server
    command: npx
    args:
      - -y
      - mcp-remote
      - https://mcp.tavily.com/mcp/?tavilyApiKey=
    env: {}
-
-
We have provided a configuration to set up the Tavily MCP server:
-
If needed, verify the solution: tavily-mcp-server config file
-
Note: Other AI assistants might use JSON files instead of YAML. If you configure a different AI assistant, the MCP server web page will have configuration examples. Explore more at Tavily MCP
-
Copy the file content and paste it into the
new-mcp-server.yamlfile.-
You are replacing the MCP SERVER NAME CONFIG, MCP SERVER NAME, ARGS, as shown here:
-
Access your Tavily account
-
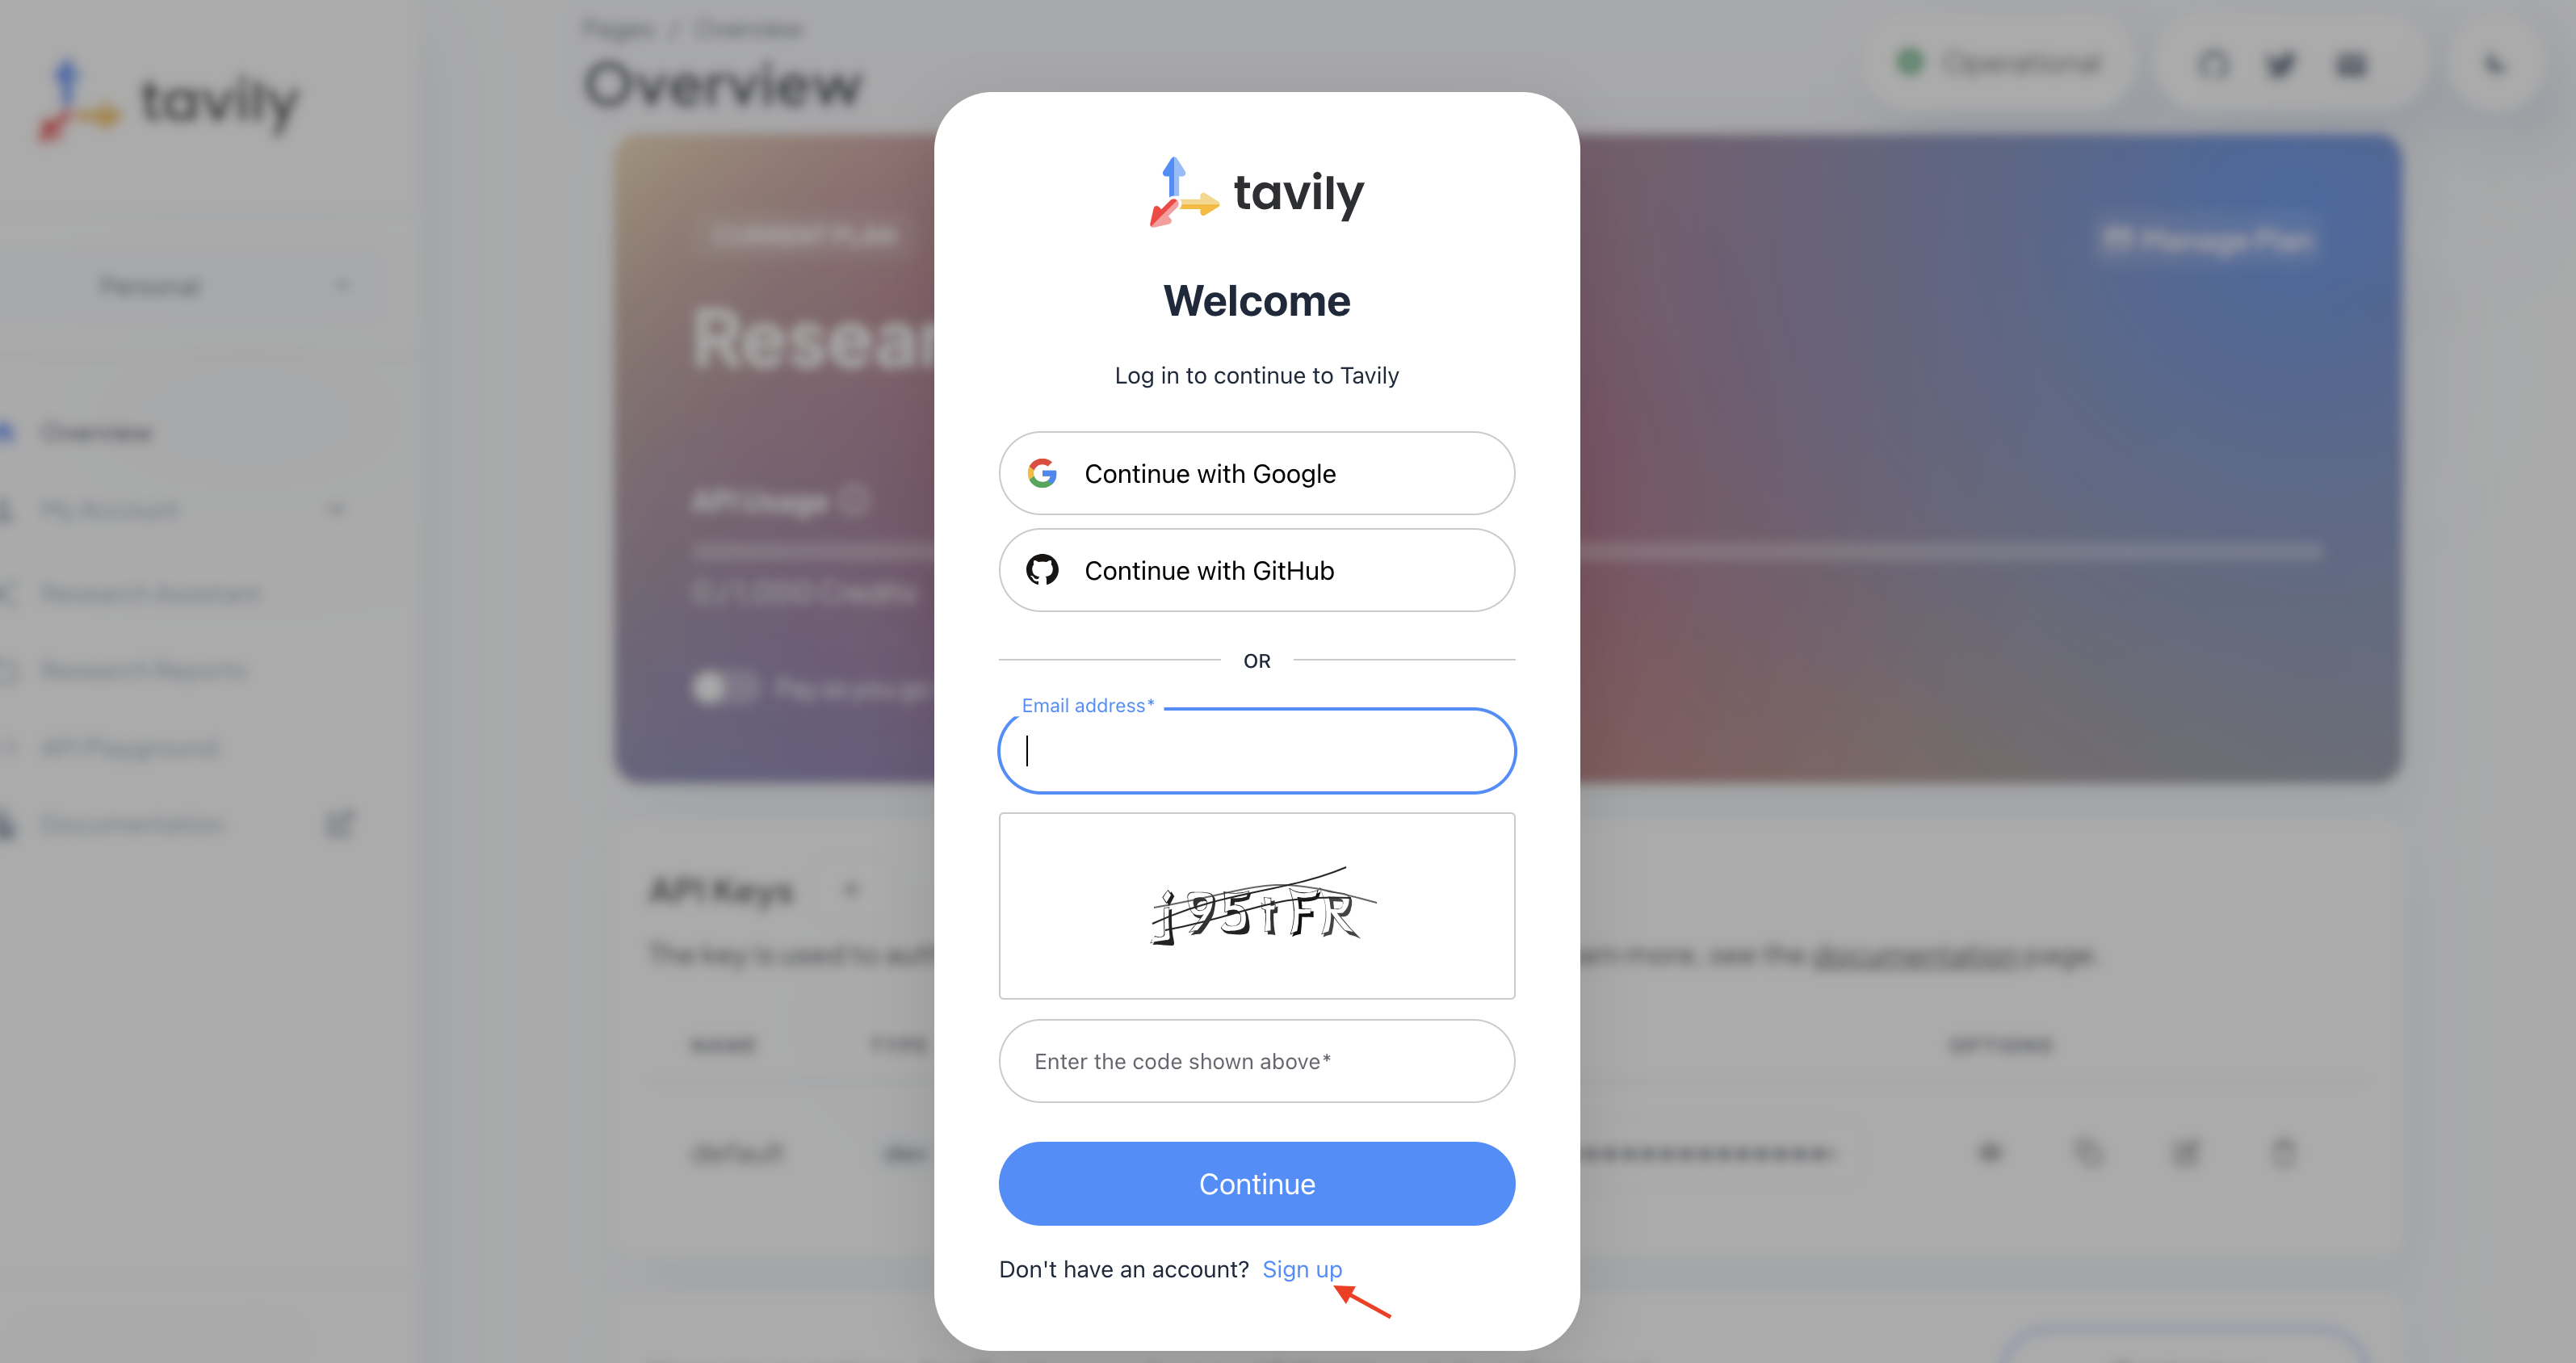
Access https://app.tavily.com.
-
Click Login and choose your previously selected sign-up method (Google, GitHub, Email address).
-
Click continue, and once logged in, you will see a screen like this one:
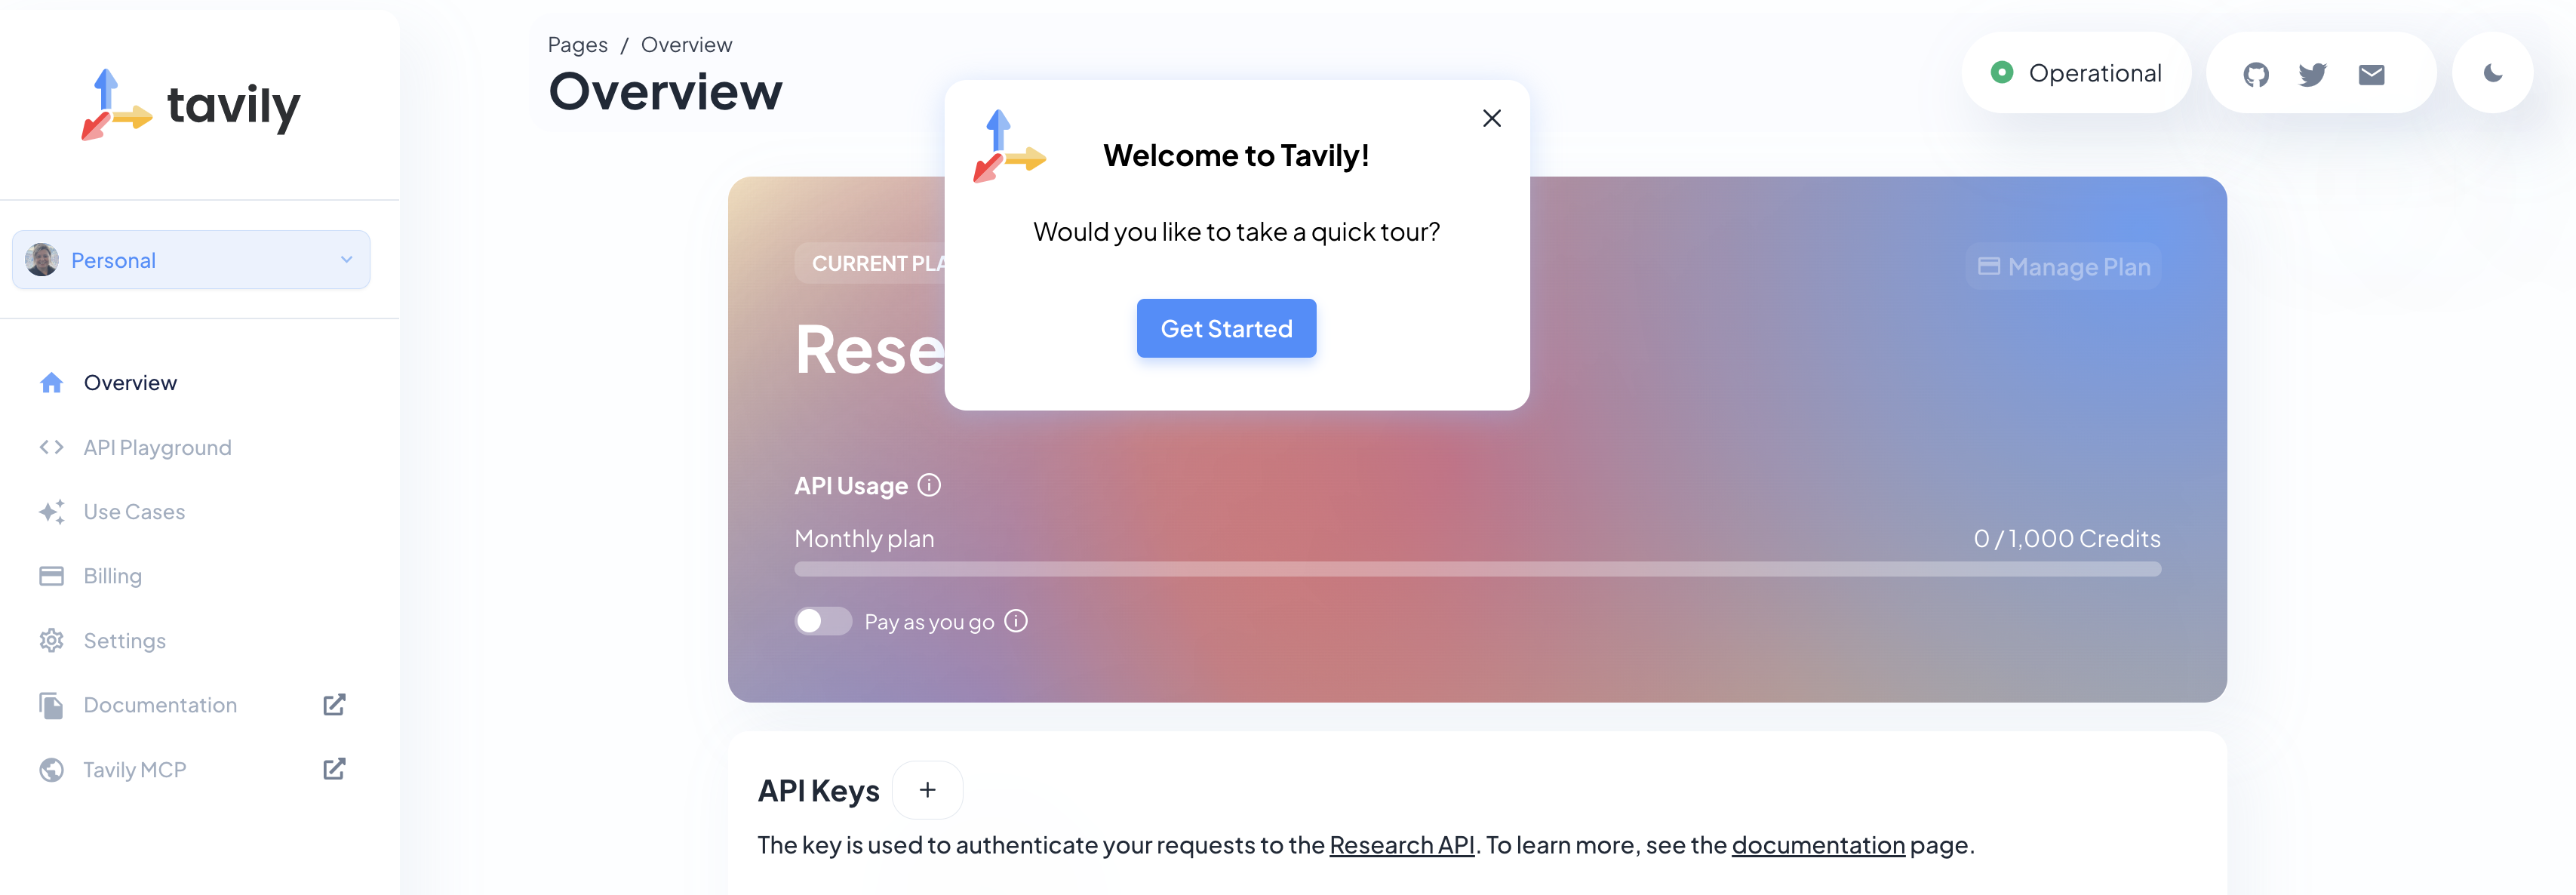
-
Click API KEY and copy the API KEY VALUE:
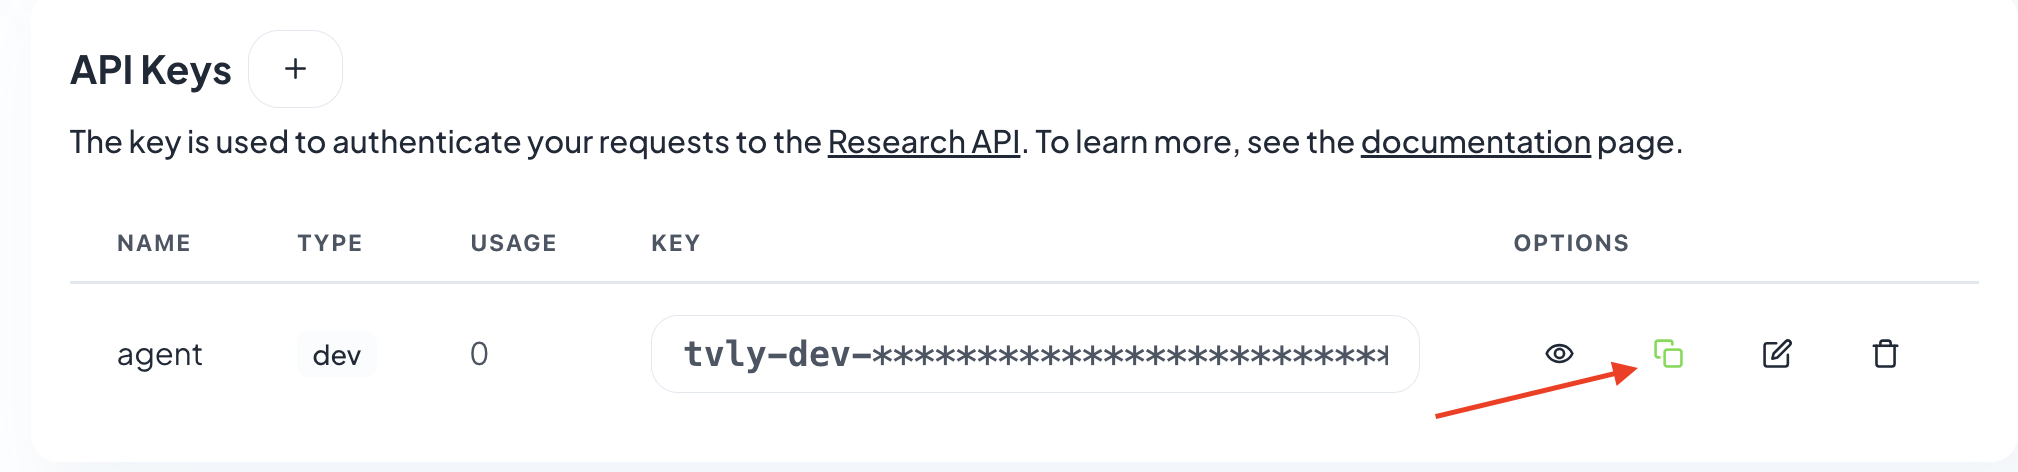
NOTE: KEEP THE API KEY SECRET. Keep it safe. DO NOT PUBLISH IT, SHARE IT, OR COMMIT IT TO ANY PUBLIC GIT REPOSITORY. THIS IS YOUR PERSONAL API KEY.
-
Paste your key after ?tavilyApiKey=
-
Save the changes.
-
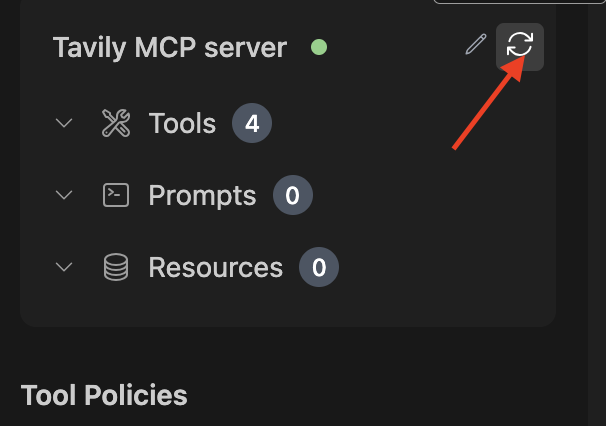
Tavily MCP server will now appear in the MCP server configuration.
If the server is not ready, click the refresh icon:
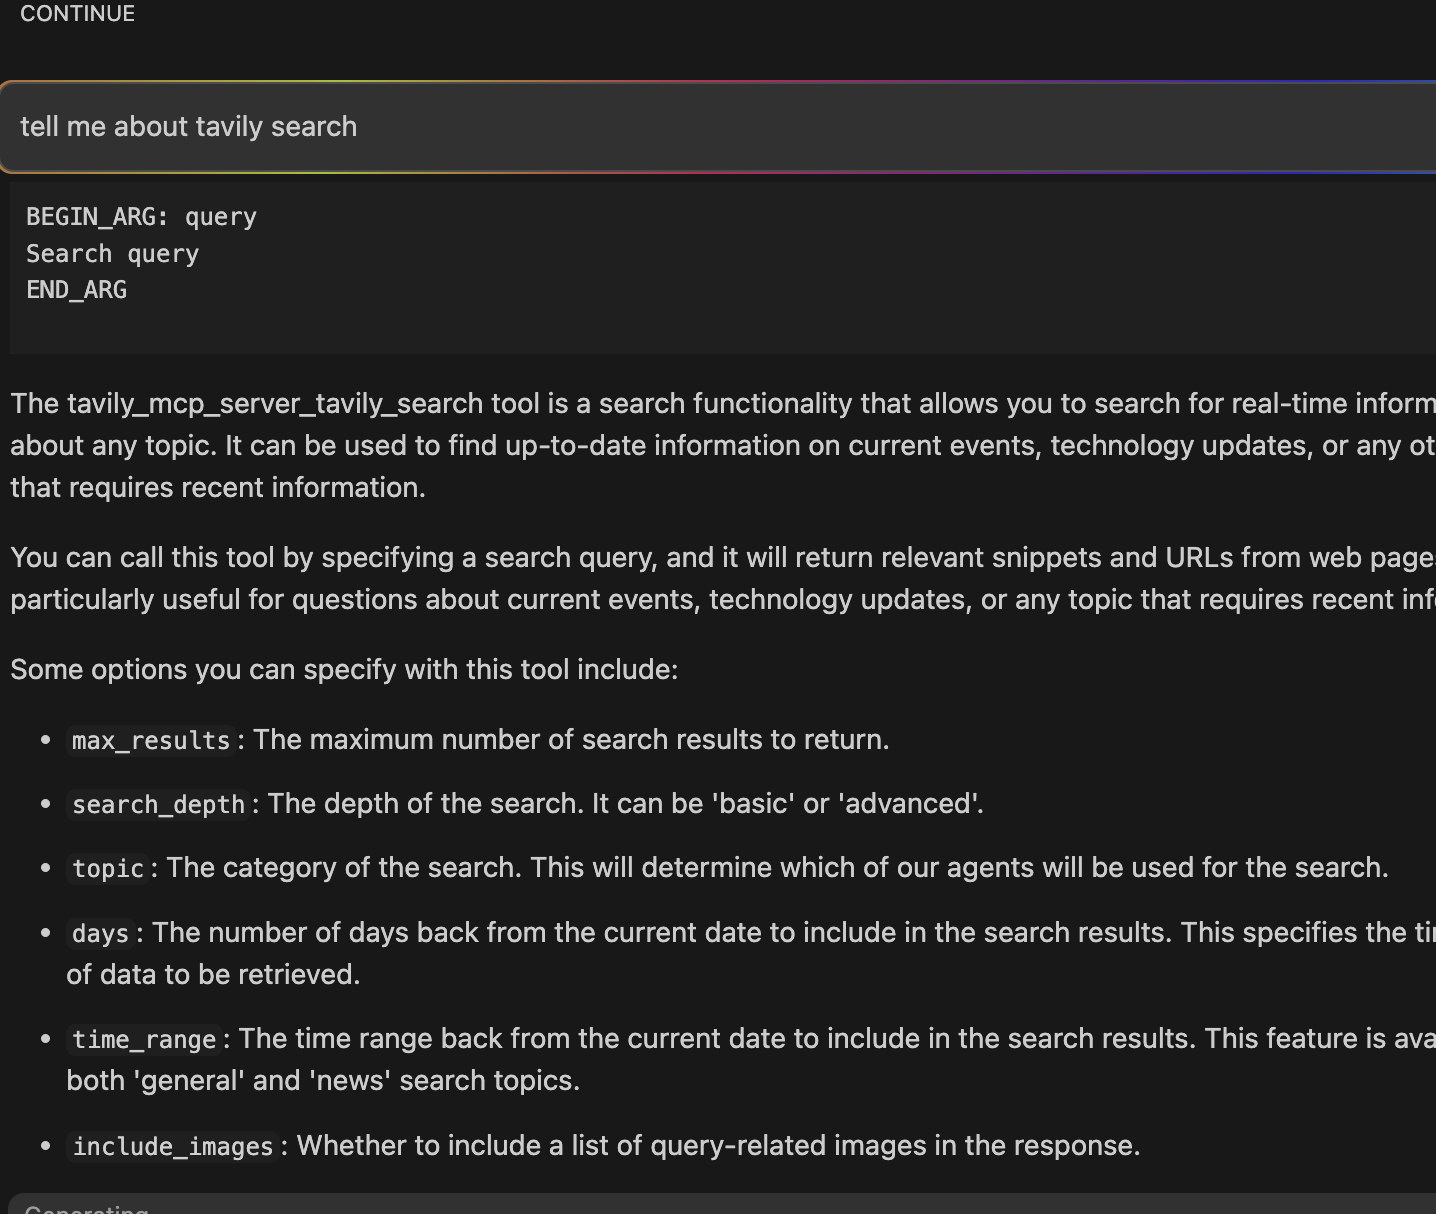
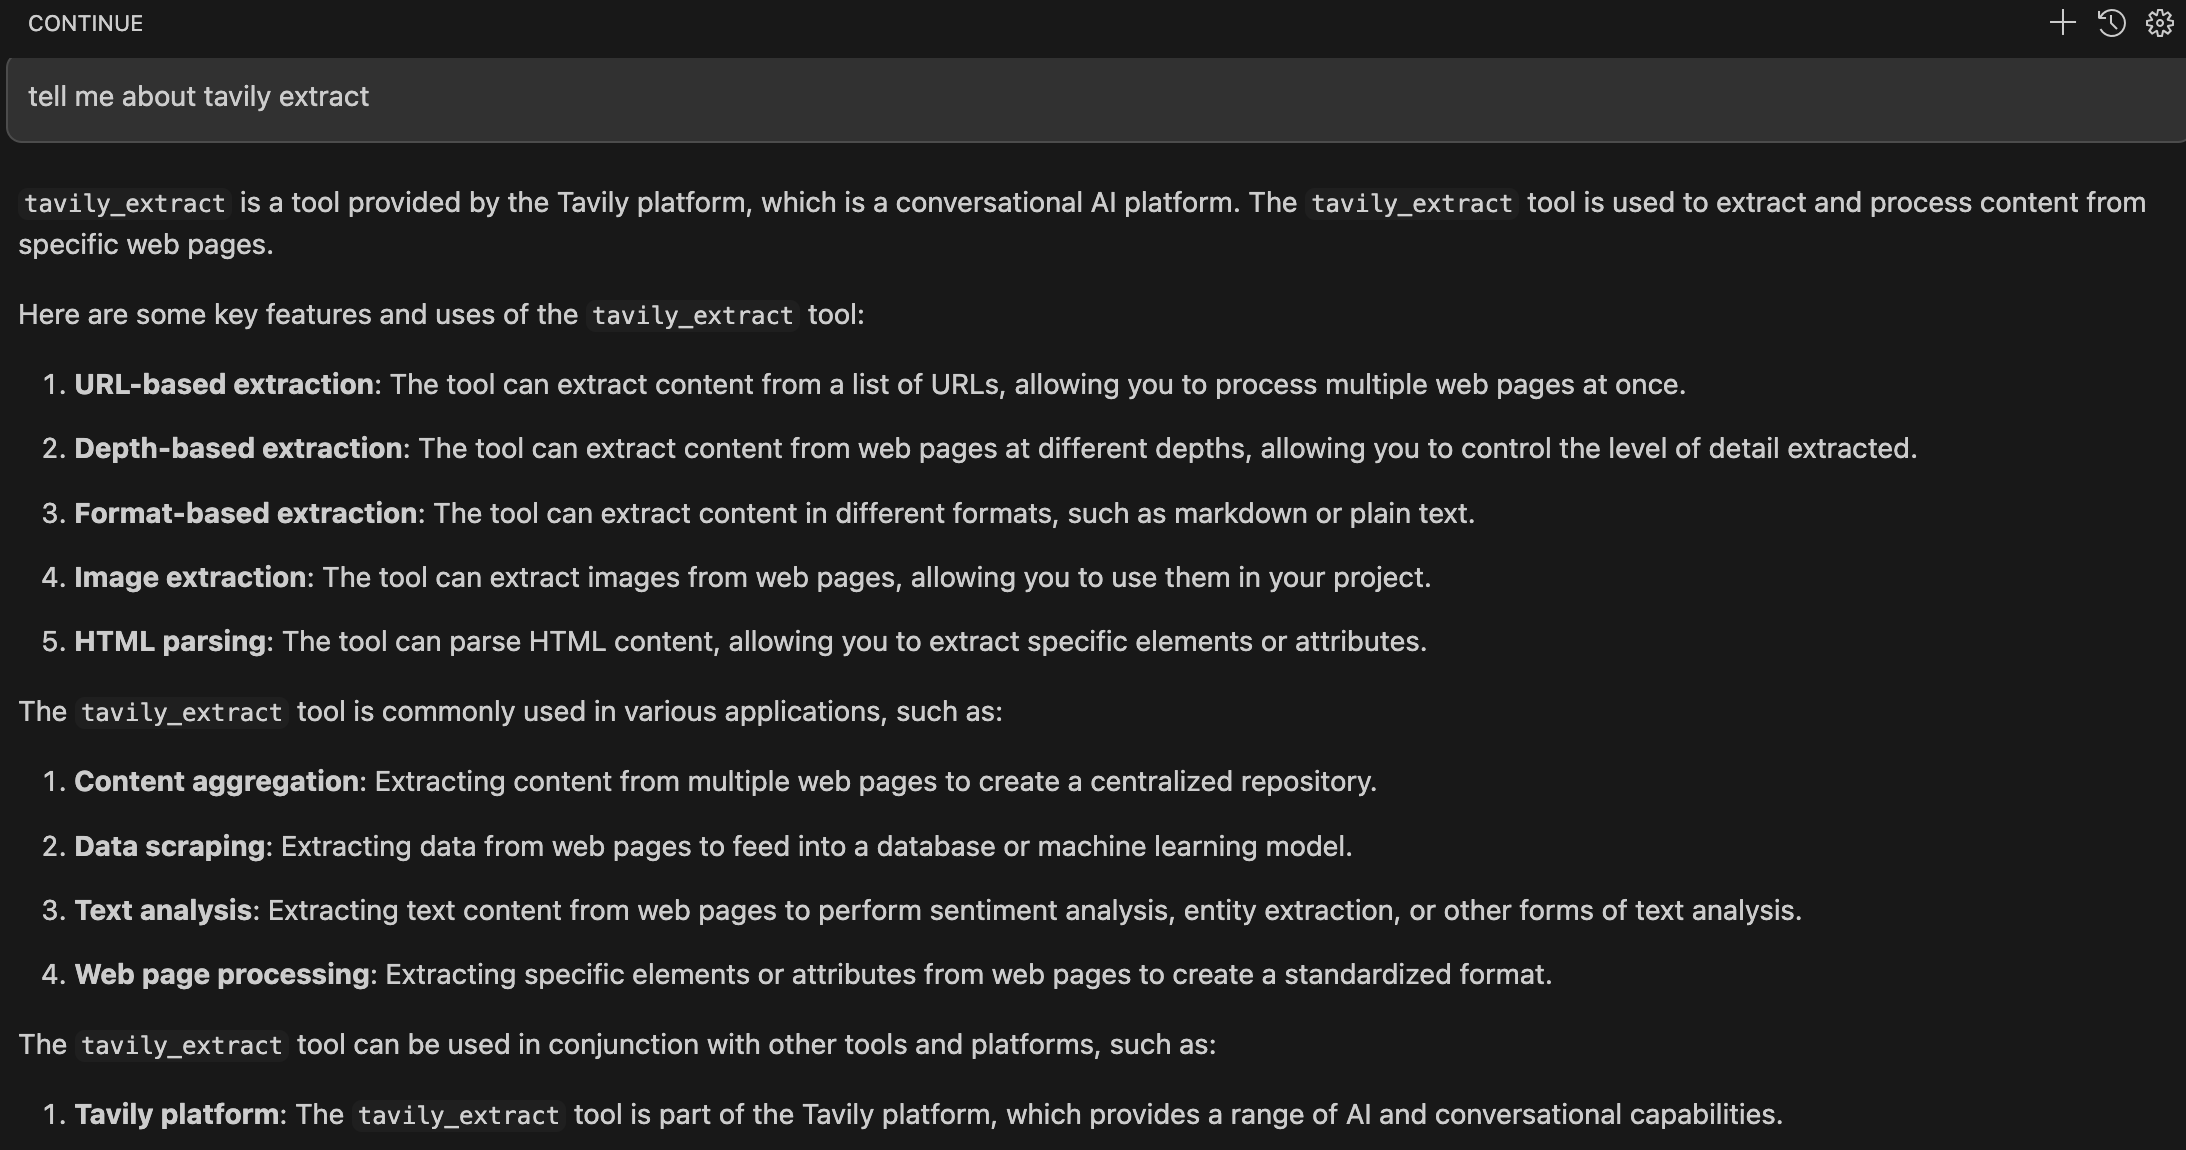
Use the MCP server in the AI Assistant to learn about Tavily
Tavily provides tools including Tavily Search and Tavily Extract.
-
Click the back icon to return to the Continue chat.

-
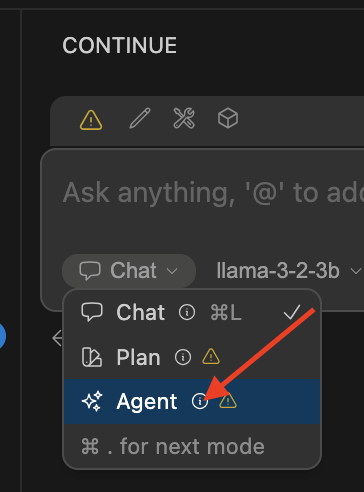
Ensure agent is selected in the Continue terminal. This agent interacts with the MCP server tools.
An agent to interact with the mcp server tools.