Namespace as a service in OpenShift using Software Template Patterns
Introduction
In this exercise you will learn how to work with Software templates in Red Hat Developer Hub and create a new OpenShift Project (also referred to as a namespace) from Red Hat Developer Hub with custom configurations.
This lab will use an existing template to create OpenShift Projects. You will work on increasing functionality by updating the software template to limit resource quotas.
During this lab, you will have the opportunity to explore different project customizations across different clusters.
Scenario
Now, imagine for a moment that you need to fulfill a need for the Python Development team. The Python Team needs the ability to create new namespaces to start prototyping with AI, and these new namespaces are not part of the Software Development Lifecycle. These new namespaces should be isolated from the rest of the cluster, with resource limits but sufficient resources for experimentation.
Explore the Project template in GitLab
-
Take the time to {gitlab_url}/rhdh/rhads-enablement-l3-st-self-service/-/blob/main/namespace-medium[review existing template^] in GitLab to get familiar with the content. If you need to log in, use your GitLab credentials:
-
Username: {gitlab_user}
-
Password: {gitlab_user_password}
-
Open the following files or folders to examine their contents:
-
template.yaml: This file defines the UI experience for the end user in Developer Hub (e.g. the fields and drop-downs and selectors to define the configuration of the namespace in this case) and the programmatic steps to define the logic to be executed as part of the component’s creation: create repositories, create GitOps objects, and more. -
skeleton/catalog-info.yaml: This file represents a descriptor file used to define and register entities and will contain information displayed in the component’s overview, such as source code, technical docs links. All of the placeholders (e.g.,${{values.component_id}}) are replaced with actual values the user enters or are dynamically computed when the template is used. -
manifests/argocd: This folder contains the Argo CD application definitions and necessary secrets to read from the SCM. In this case, theargo-app-dev.yamlis the Argo CD Application pointing to the Kubernetes manifest folder, in this case, the VM’s manifests. The file name contains the component’s ID name, which will be populated from the Developer Hub template when the final file is created for the user in their git repository. Developer Hub, powered by GitOps, maintains the desired state (defined in the manifests)as the actual state in the cluster for any template definitions, ensuring system stability. -
manifests/helm/app: This folder contains a Helm chart that will be used to create the namespace. OpenShift GitOps will use this Helm chart to create the namespace by combining user-supplied values with the files (e.g.quota.yaml) and creating the objects in OpenShift. When these files are updated in the user’s git repo, OpenShift GitOps will automatically deploy (sync) the changes to maintain the desired state, ensuring system stability.
Explore the Project template in Developer Hub
-
Access the {rhdh_url}[Red Hat Developer Hub UI^]. If you need to, log in with your credentials:
-
Username:
{openshift_admin_user} -
Password:
{openshift_admin_password}
-
-
Select the plus icon in the top navigation bar to Create a new component, or use the URL {rhdh_url}/create[Red Hat Developer Hub UI Create^]
![]()
-
Click the Import an existing Git repository button.
-
Enter the following URL in the Select URL field and click Analyze:
{gitlab_url}/rhdh/rhads-enablement-l3-st-self-service/-/blob/main/namespace-medium/template.yaml-
Click the Import button
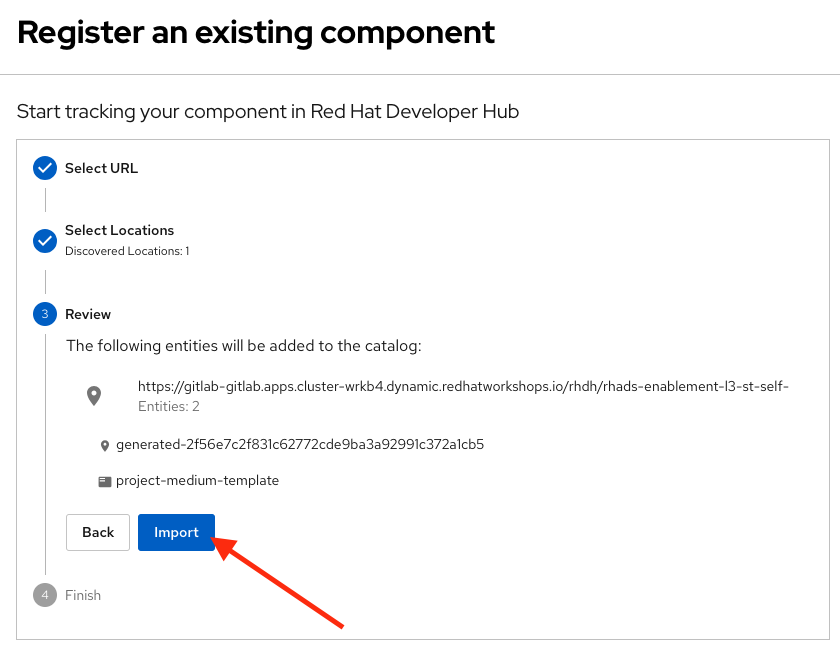
Congratulations! You now have a new software template in Developer Hub. End users can now self-provision namespaces.
Explore the end-user experience
We’ll explore the end-user experience by accessing the Software Templates view.
-
Navigate to Catalog → Self-service
-
Look for the OpenShift Project Medium Size catalog

-
Click on Choose
-
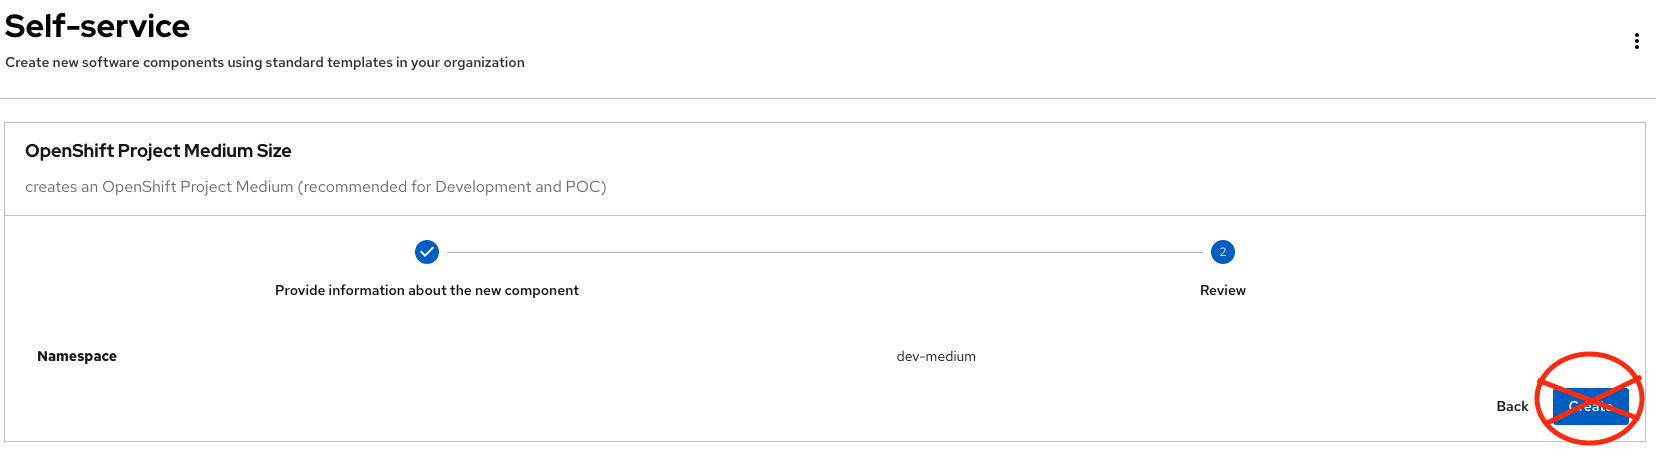
Review and fill out the form with sample data until you reach the review screen, without creating the Namespace. DO NOT CLICK ON CREATE. We’ll do that later on after changing the template.
Implement changes in Software Templates
To do this, we will be updating the quotas definition in the quota.yaml file to enforce a limit on the resources that can be used in the namespace, so that the Python Team doesn’t accidentally use too many resources.
Edit the template
-
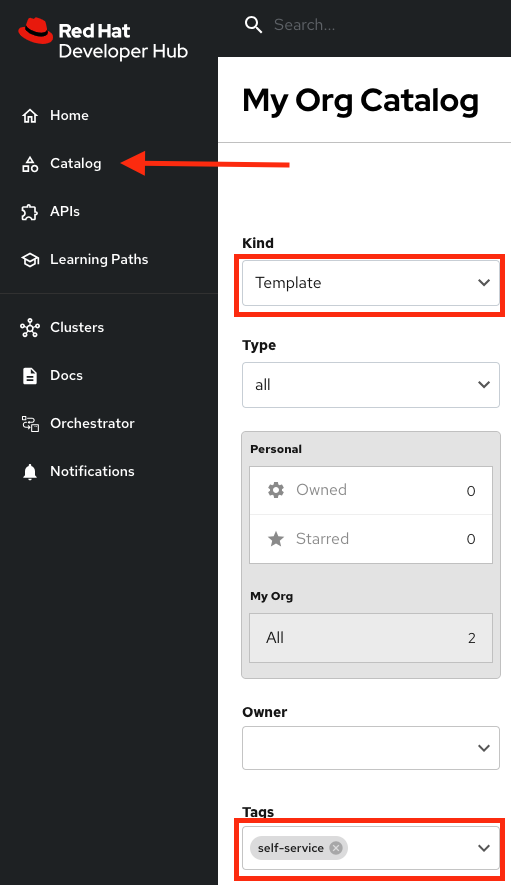
Click on Catalog on the Developer Hub menu
-
Next, select the filters: Kind:Template and Tags: self-service, as shown:
-
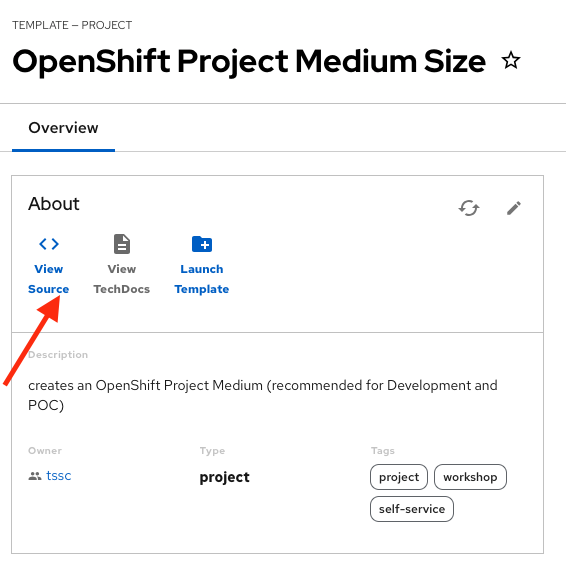
Select the OpenShift Project Medium Size
-
Access the Source code by clicking on View Source
-
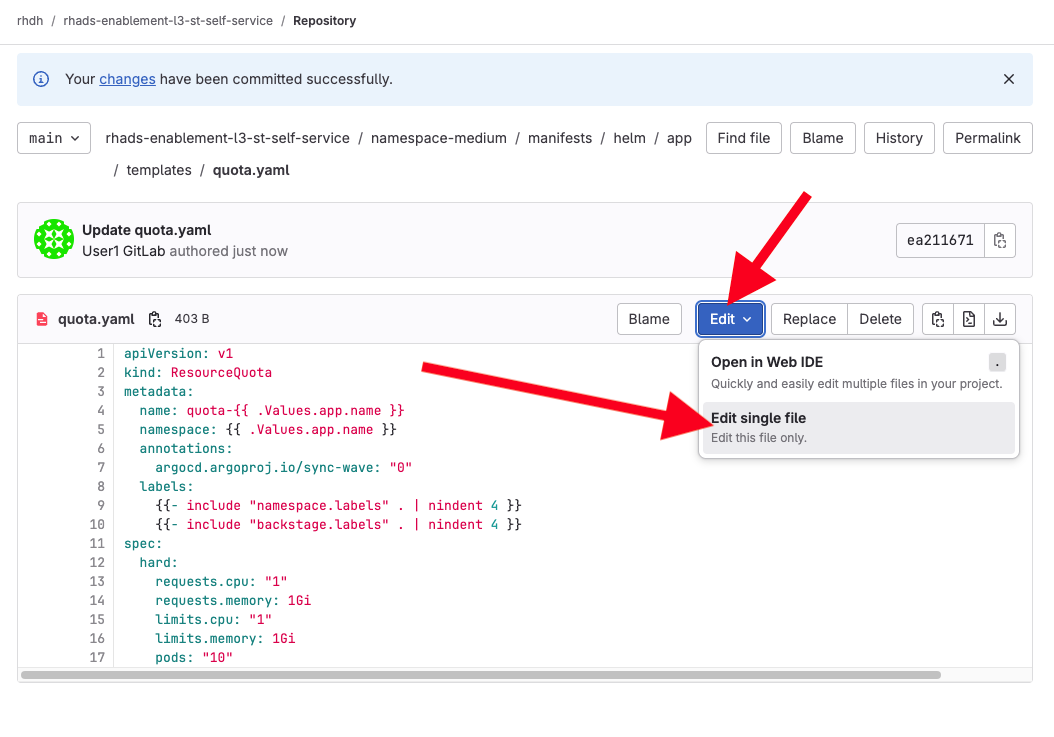
Navigate to the {gitlab_url}/rhdh/rhads-enablement-l3-st-self-service/-/blob/main/namespace-medium/manifests/helm/app/templates/quota.yaml[quota.yaml file^] (it’s in the
manifests/helm/app/templatesfolder). This file defines the quotas for the namespace and is applied to the namespace when it is created by OpenShift GitOps. -
Edit the file by choosing Edit → Edit Single File:
-
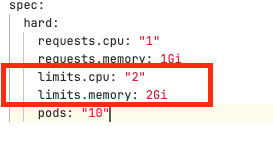
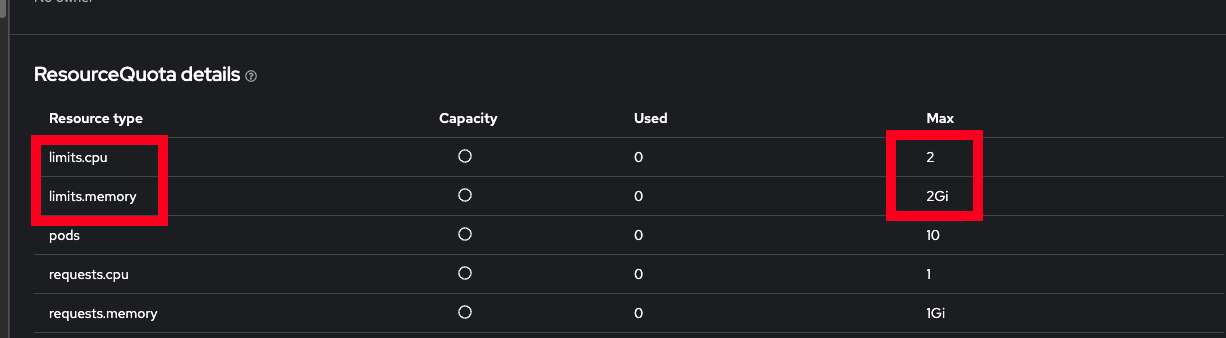
Increase the quota limits by changing the value of
limits.cputo"2"andlimits.memoryto2Giin thequota.yamlfile, as shown:
-
Review your file against the quota.yaml solution file if necessary.
-
Scroll down and click the Commit Changes button to save your updates.
-
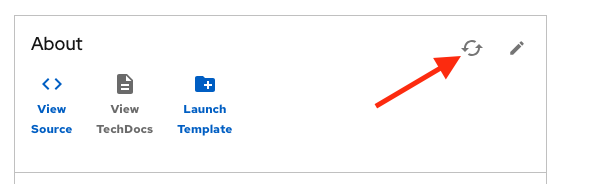
Back in the Developer Hub catalog, on the {rhdh_url}/catalog/default/template/rhel-vm-medium-template/[Template^], click on the Schedule entity refresh icon to sync the catalog with the latest changes.
Test your changes: Explore the user experience as Developer
Now you will create a new Project by using your updated software template.
-
From catalog, select Self-service, then select OpenShift Project Medium Size
-
Click on Choose
-
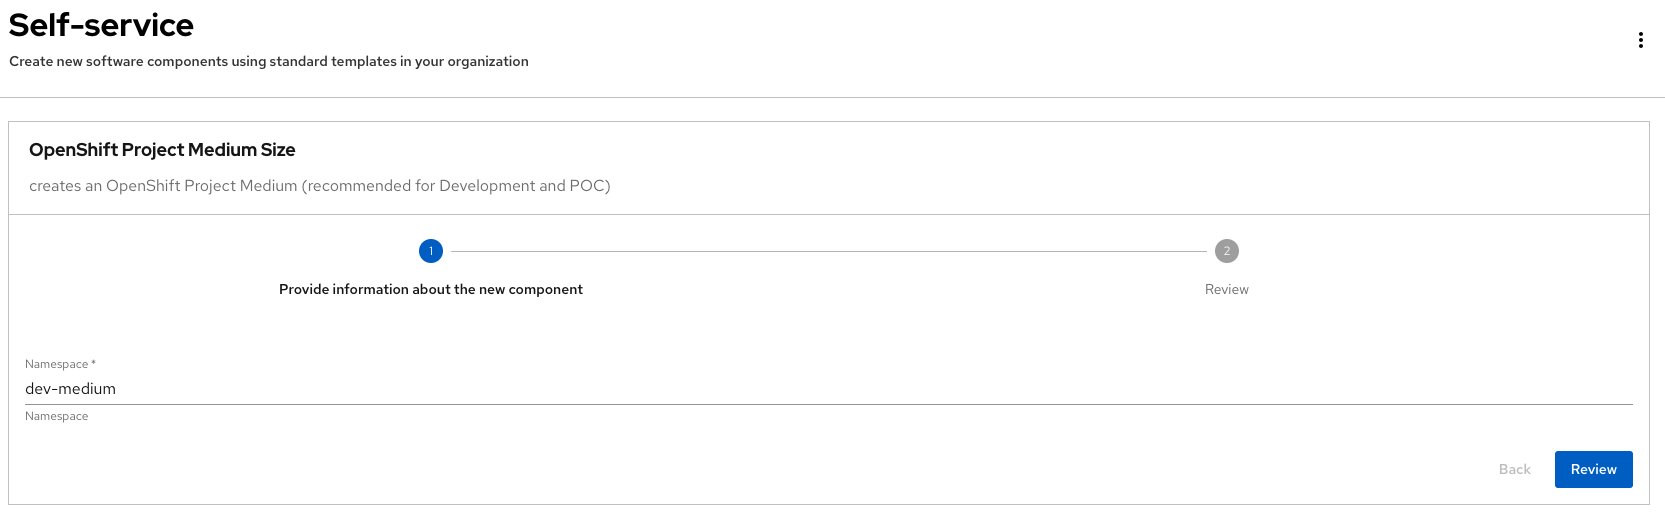
Create a new Project by following the flow. Feel free to use the default values or enter your own namespace name.
-
Review the information until you complete the flow and click Create. You should see a screen like this one:
-
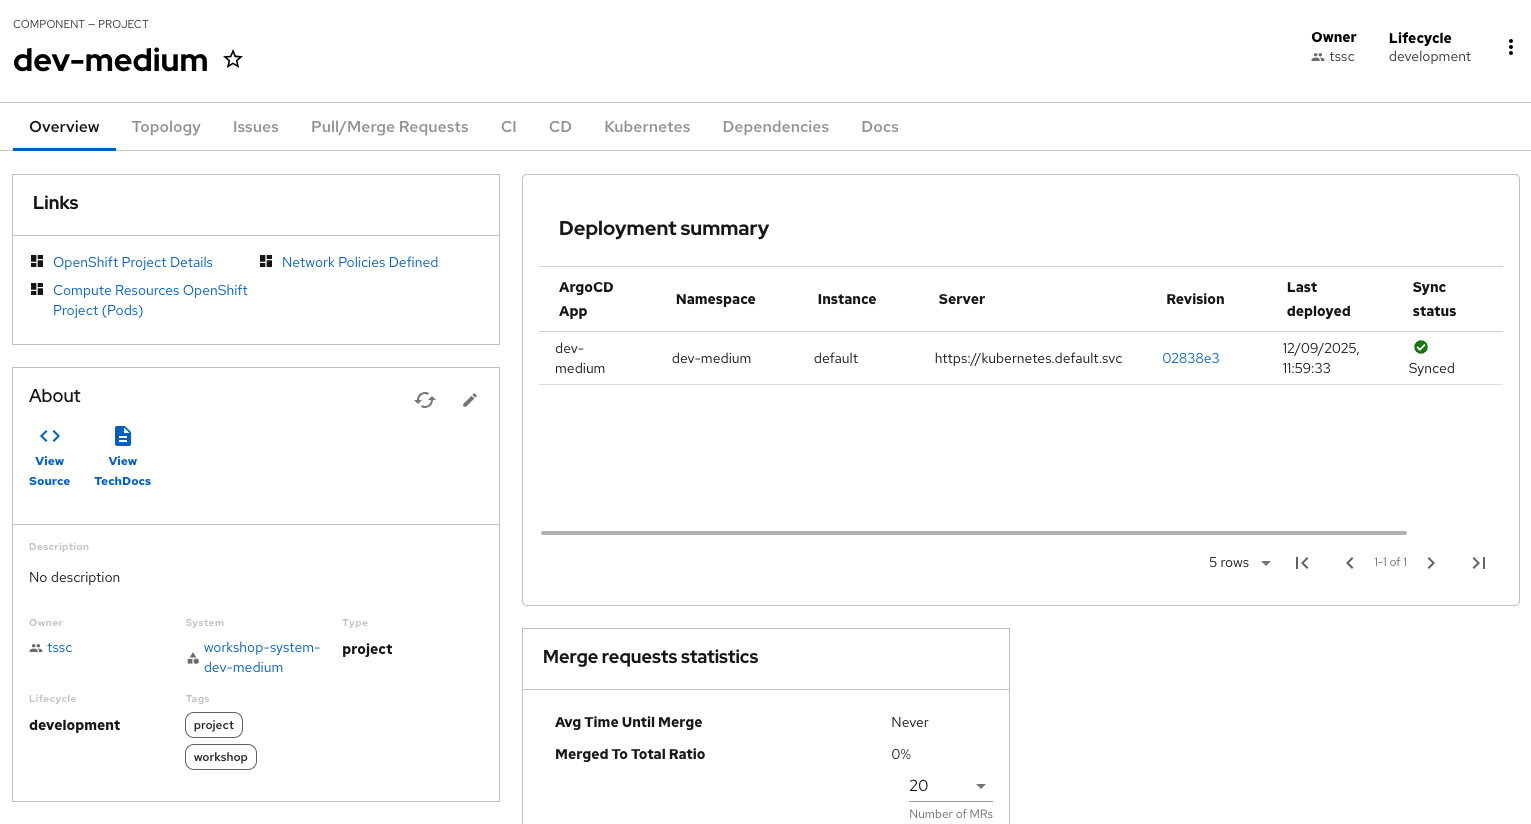
Open the catalog from the component’s creation page by clicking on the Open Component in Catalog button.

-
A new component has been created and you should see a screen similar to this:
Verify the namespace was created
-
Log in to the {openshift_console_url}[OpenShift Web Console^]
-
Use your administrator credentials:
-
Username: {openshift_admin_user}
-
Password: {openshift_admin_password}
-
-
-
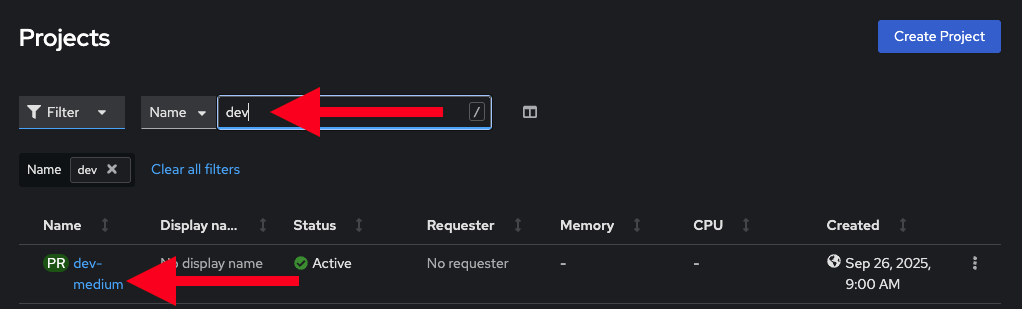
Navigate to Home→Projects
-
Enter
devin the search field -
You should see the new namespace you created:
-
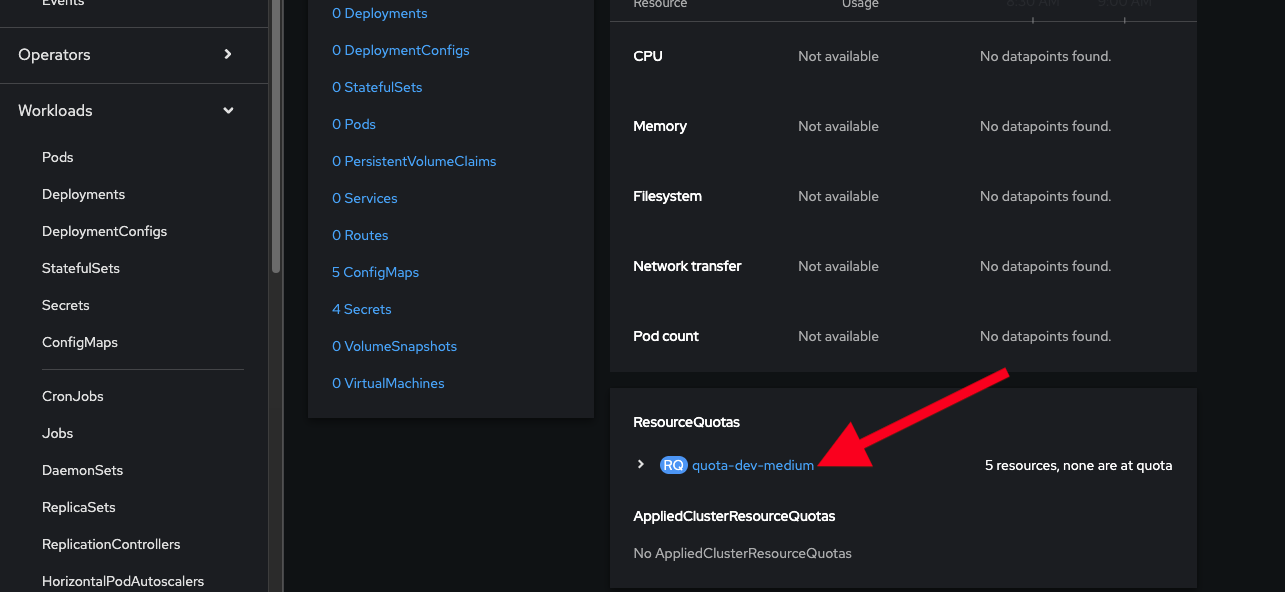
Select the new namespace to view the details.
-
Scroll down to Resource Quotas, and click on the name of the quota to view the details:
-
Scroll to the bottom to view the details of the quota and confirm your new limits are in place:
-
Watch the following arcade, to explore a similar experience:
Conclusion
🎉 Congratulations! You’ve successfully transformed how developers can provision OpenShift namespaces in your organization!
In this hands-on lab, you’ve accomplished something truly powerful:
-
Enabled self-service at scale - The Python Development team (and any other team) can now instantly provision isolated namespaces without waiting for manual intervention from platform teams
-
Implemented governance through code - By updating the quota template, you’ve embedded resource governance directly into the provisioning process, ensuring teams get the resources they need while protecting the cluster from overuse
-
Bridged development and operations - You’ve created a seamless experience where developers can focus on building AI prototypes while GitOps automatically handles the underlying infrastructure
The template you’ve customized is now a reusable, version-controlled asset that can be refined, extended, and replicated across different environments. This is the power of Platform Engineering in action - turning complex infrastructure operations into simple, self-service experiences that accelerate innovation while maintaining control.
What’s next? Consider how you might extend this pattern to provision other resources like databases, monitoring dashboards, or even complete application stacks. We’ll cover databases in the next section, but the possibilities are limitless!