Installing and Configuring Red Hat Trusted Artifact Signer on RHEL
Red Hat Trusted Artifact Signer is a comprehensive solution for signing and verifying software artifacts to ensure their integrity and authenticity. This module will guide you through the installation and configuration process on Red Hat Enterprise Linux using Red Hat Ansible Automation Platform.
Overview
The RHTAS service is the downstream redistribution of the Sigstore project.
Although you could independently install and configure the components of RHTAS, Red Hat strongly recommends using the supported Ansible collection to ensure you are using the latest version of the products and to leverage the latest features and bug fixes, and configure the many components of RHTAS in a consistent, secure, and repeatable manner. Much like Operators in Kubernetes, Ansible Automation provides an easy way to both install and handle ongoing management of RHTAS. Production environments can be managed using the same process you’ll go through in this workshop.
The automation contained in the Ansible collection you will use will install and configure the components of RHTAS to run on a single RHEL server, which uses a standalone containerized deployment. A Kubernetes-based manifest creates Kubernetes manifests for the containers and deploys them on the RHEL host using podman kube play. This playbook will give you a basic signing framework, and enable various day-1 and day-2 operations going forward. Specifically, the playbook supports:
-
Installation of RHTAS on a single RHEL node.
-
Backup/Restore of TAS signing data (protects the signing data of your software supply chain, critical when there is data loss due to hardware failure or accidental data deletion).
-
Refreshing TUF metadata (helping to maintain a secure coding environment for developers and prevent mix-and-match attacks on a code base).
-
Certificate and key rotation for Rekor, Certificate Transparency, Fulcio, and Timestamp Authority services - these components will be explained soon (rotating these keys regularly can help prevent key tampering and theft).
For more detail and examples of performing day-1 and day-2 operations with RHTAS, consult the RHTAS RHEL administration documentation.
Components of RHTAS
The RHTAS Ansible collection deploys the following RHTAS components onto the rhtas machine:
-
Rekor - An immutable, tamper-evident transparency log for storing and verifying software supply chain metadata.
-
Trillian database - A Merkle tree-backed data store that underpins Rekor’s transparency log.
-
Optional: A self-managed MariaDB instance (for durable SQL storage), and a Redis instance (for caching and service management) - both highly recommended for production deployments to simplify operations and offload service management, including data backup and restoration.
-
-
Fulcio - A certificate authority that issues short-lived code-signing certificates tied to an OpenID Connect (OIDC) identity.
-
Certificate Log - A transparency log that records issued certificates for auditability and trust verification.
-
Timestamp Authority - A service that provides trusted cryptographic timestamps to prove when data or signatures existed.
-
The Update Framework (TUF) server - A secure distribution system that manages and delivers software updates with integrity and resilience against compromise.
-
An NGINX front end provides an entrypoint to the various backend components. A set of self-signed certificates get generated at runtime to establish secure communication with the following hosts (these services are not available yet, but you’ll deploy them shortly):
Each RHTAS release is associated with and installs specific versions of the above components. For more detail on these dependencies, visit the Red Hat Trusted Artifact Signer Release Notes.
The following steps will take you through the installation and configuration of RHTAS on RHEL. Not all configuration possibilities are covered in this module, but you can find more information in the RHTAS Ansible collection documentation.
Install Trusted Artifact Signer
Setup Environment Variables
-
Copy and paste (you can click the small icon to the right of the command to copy, and then CTRL-V or CMD-V on MacOS to paste) into the terminal and press ENTER to run the command and assign the necessary environment variables:
export GUID=my-guid
export BASE_HOSTNAME={base_hostname}
export KEYCLOAK_REALM=trusted-artifact-signer
export KEYCLOAK_URL=https://rhbk.$BASE_HOSTNAME
export TUF_URL=https://tuf.$BASE_HOSTNAME
export OIDC_ISSUER_URL=$KEYCLOAK_URL/realms/$KEYCLOAK_REALM
export COSIGN_FULCIO_URL=https://fulcio.$BASE_HOSTNAME
export COSIGN_REKOR_URL=https://rekor.$BASE_HOSTNAME
export COSIGN_MIRROR=$TUF_URL
export COSIGN_ROOT=$TUF_URL/root.json
export COSIGN_OIDC_CLIENT_ID=$KEYCLOAK_REALM
export COSIGN_OIDC_ISSUER=$OIDC_ISSUER_URL
export COSIGN_CERTIFICATE_OIDC_ISSUER=$OIDC_ISSUER_URL
export COSIGN_YES="true"
export SIGSTORE_FULCIO_URL=$COSIGN_FULCIO_URL
export SIGSTORE_OIDC_ISSUER=$COSIGN_OIDC_ISSUER
export SIGSTORE_REKOR_URL=$COSIGN_REKOR_URL
export REKOR_REKOR_SERVER=$COSIGN_REKOR_URL
export CLI_SERVER_URL=https://cli-server.$BASE_HOSTNAME
These environment variables define the various endpoints and configuration for the RHTAS service, and are read from the CLI commands you’ll run later in the module. Note that the URLs being constructed correspond to the URLs listed previously.
-
Next, run these two commands, replacing the username and password or service account token with your own (don’t just copy-paste, you’ll need to replace the placeholders with your own values):
export REGISTRY_USERNAME='<your username>' export REGISTRY_PASSWORD='<your password or service account token>' -
To verify that your credentials are correct, attempt to login to the registry using
podman login:podman login registry.redhat.io \ -u "$REGISTRY_USERNAME" \ -p "$REGISTRY_PASSWORD"You should see
Login Succeeded!indicating that you are logged in. If you get an error, confirm that your credentials are correct and that you have the correct permissions to access the registry.
Create Ansible Variables
-
Create the Ansible variables file which will be used by the playbook when installing RHTAS.
cat << EOF > ~/rhtas_vars.yml
# Hostname
tas_single_node_base_hostname: "$BASE_HOSTNAME" (1)

# Registry Configurations
tas_single_node_registry_username: ""
tas_single_node_registry_password: ""

# Certificates (2)
tas_ingress_certificate_root_ca_file: "/home/lab-user/rhtas-root.pem"
tas_ingress_certificate_root_key_file: "/home/lab-user/rhtas-privkey.pem"
tas_ingress_certificate_cert_file: "/home/lab-user/rhtas-server.pem"
tas_ingress_certificate_key_file: "/home/lab-user/rhtas-privkey.pem"


# OIDC Configuration (3)
tas_single_node_oidc_issuer: "$OIDC_ISSUER_URL"
tas_single_node_oidc_client_id: "$KEYCLOAK_REALM"

# Fulcio OIDC Configuration
tas_single_node_fulcio:
  fulcio_config:
    oidc_issuers:
      - issuer: "{{ tas_single_node_oidc_issuer }}"
        client_id: "{{ tas_single_node_oidc_client_id }}"
        url: "{{ tas_single_node_oidc_issuer }}"
        type: email

# Ingress TLS Certificates
tas_single_node_ingress_certificates:
  root:
    ca_certificate: |
      {{ lookup('file', tas_ingress_certificate_root_ca_file) }}
    private_key: |
      {{ lookup('file', tas_ingress_certificate_root_key_file) }}
  fulcio:
    certificate: |
      {{ lookup('file', tas_ingress_certificate_cert_file) }}
    private_key: |
      {{ lookup('file', tas_ingress_certificate_key_file) }}
  rekor:
    certificate: |
      {{ lookup('file', tas_ingress_certificate_cert_file) }}
    private_key: |
      {{ lookup('file', tas_ingress_certificate_key_file) }}
  tuf:
    certificate: |
      {{ lookup('file', tas_ingress_certificate_cert_file) }}
    private_key: |
      {{ lookup('file', tas_ingress_certificate_key_file) }}
  tsa:
    certificate: |
      {{ lookup('file', tas_ingress_certificate_cert_file) }}
    private_key: |
      {{ lookup('file', tas_ingress_certificate_key_file) }}
  rekor-search:
    certificate: |
      {{ lookup('file', tas_ingress_certificate_cert_file) }}
    private_key: |
      {{ lookup('file', tas_ingress_certificate_key_file) }}
  cli-server:
    certificate: |
      {{ lookup('file', tas_ingress_certificate_cert_file) }}
    private_key: |
      {{ lookup('file', tas_ingress_certificate_key_file) }}

# System Packages
tas_single_node_system_packages:
  - podman
  - firewalld
EOF
1 The base host name of the managed node. This generates self-signed certificates for the individual HTTPS endpoints. 2 Note that these certificates are signed by a legitimate certificate authority. They are not "self-signed". 3 This uses the pre-installed Keycloak instance as the OpenID Connect provider.
Create Ansible Playbook
-
Create the Ansible playbook which is the main entry point for installation.
cat << EOF > ~/install_rhtas.yml
---
- name: Install RHTAS
  hosts: rhtas
  become: true
  tasks:
    - name: Include Vars
      ansible.builtin.include_vars:
        file: rhtas_vars.yml
    - name: Call tas_single_node role
      ansible.builtin.include_role:
        name: redhat.artifact_signer.tas_single_node
...
EOF
Create Inventory File
-
Create the inventory file which defines the hostnames of the managed nodes. We’ll use the
rhtashostname for this exercise, andrhtpafor a later exercise.cat << EOF > ~/inventory [rhtas] rhtas [rhtpa] rhtpa [all:vars] ansible_user=lab-user EOF
Run Playbook to install RHTAS
You should have the following files in the ~/ directory (run ls -l ~/ to confirm):
-
rhtas_vars.yml- The Ansible variables file to use with RHTAS configuration -
install_rhtas.yml- The Ansible playbook to install RHTAS -
inventory- The inventory file to use specifying which hosts to use -
rhtas-privkey.pem- The private key for the TLS certificates for RHTAS -
rhtas-root.pem- The root TLS signed certificate for RHTAS -
rhtas-server.pem- The server certificate for RHTAS
There may be other files (e.g. the rhtpa- files used later for RHTPA), but these are the ones you should have. If you do not have these files, please go back and review the previous steps. If you do have the files, you can continue with the next step.
-
Run the following command to install RHTAS.
cd ~ && \
ansible-navigator \(1)
  -m stdout \(2)
  --eei=localhost/ansible_ee \(3)
  --pp=missing \(4)
  run install_rhtas.yml \(5)
  --pae=false \(6)
  -i inventory \(7)
  -e tas_single_node_registry_username="$REGISTRY_USERNAME" \(8)
  -e tas_single_node_registry_password="$REGISTRY_PASSWORD" (9)
1 Ansible Navigator is used to enable running the playbook in the specific execution environment (which ansible-playbookcannot do). The execution environment is a container image (you can see it exists by running thepodman imagescommand)2 Displays the output of the playbook in the terminal. 3 The specific execution environment in which the playbook runs and contains the required Ansible Collections for the products. 4 Only pull the execution environment image if not already present locally (which it is) 5 The playbook to run. 6 Don’t create playbook artifacts (like JSON log files) 7 The inventory file to use 8 The registry username to use 9 The registry password to use The installation will take several minutes to complete. Wait for it to finish before moving on! It should end with:
PLAY RECAP **************************
rhtas : ok=262  changed=114  unreachable=0    failed=0  ...
If you see any errors, scroll up and check for errors in the output. Confirm the files exist in the
/home/lab-userdirectory correctly and appear correct. You can then attempt to run the same command again.
Inspect Trusted Artifact Signer installation
-
Once installation is complete, to see the running services on the
rhtasnode, run the following command:ssh rhtas sudo "podman pod ps --filter status=running"This will run the
podman pod pscommand on therhtasnode. You should see a number of pods for each of the services that were installed for RHTAS, includingrekor,rekor-search,fulcio,tuf,tlog,cli-server,trillian, andnginx. -
To see the log files for the
rekorservice, run the following command:ssh rhtas "sudo podman pod logs -f rekor-server-pod"Press CTRL+C to exit the log output. These commands can be useful for debugging issues with the RHTAS installation.
RHTAS components are deployed using
podman kube play. The playbook creates a Kubernetes-style deployment for each of the services in the/etc/rhtas/manifestsdirectory on the target machine, along with ConfigMaps and Secrets in/etc/rhtas/configsdirectory, and then runs them as Podman containers on the target machine via systemd services (defined in the/etc/systemd/systemdirectory on the target machine).Although these are Kubernetes objects, Podman is not a complete Kubernetes implementation, e.g. there is no control plane, Kubernetes API, or scheduler.
podman kube playoffers a bridge between Podman and Kubernetes, simplifying the workflow between the two. -
Take a look at the
rekorsystemd service’s ConfigMap, Secret, and Deployment Kubernetes resources by running the following commands:echo "--------------------------------" echo "Rekor Deployment:" echo "--------------------------------" ssh rhtas "sudo cat /etc/rhtas/manifests/rekor-system_rekor-server.yml" echo "--------------------------------" echo "Rekor ConfigMap:" echo "--------------------------------" ssh rhtas "sudo cat /etc/rhtas/configs/rekor-server-config.yaml" echo "--------------------------------" echo "Rekor Secret:" echo "--------------------------------" ssh rhtas "sudo cat /etc/rhtas/configs/rekor-secret.yaml" echo "--------------------------------"If you are familiar with Kubernetes, these files should look very familiar.
podman kube playcreates pods and containers, creates volumes (e.g. for ConfigMaps), and sets up networking policies between services.You will find similar files for the other services in
/etc/rhtas.It is recommended to manage the configuration of RHTAS through the supported Ansible playbooks and roles. If you modify the configuration files manually, they will likely be overwritten during the next installation or upgrade. Instead, alter the playbook and re-run it to apply the changes.
-
You can inspect the individual RHTAS services using traditional systemd commands. For example, to see the Rekor service’s current status, run the following command:
ssh rhtas "sudo systemctl status rekor.service" | head -9This will show the current status of the
rekor-serverservice. Other services can be managed in a similar manner (e.g.fulcio.service,tuf.service, etc). For example, to restart thecli-serverservice, run the following command:ssh rhtas "sudo systemctl restart cli-server.service"This will restart the
cli-serverservice.
Verify Trusted Artifact Signer installation
After installation and configuration, you can verify that Red Hat Trusted Artifact Signer (RHTAS) is working correctly by signing and verifying test artifacts. This section covers signing and verifying test artifacts using the following methods: Cosign for container images, Gitsign for Git commits, and Conforma (formerly known as Enterprise Contract) for policy validation. You can use any or all of these methods in your own CI pipelines to sign and verify artifacts before they are deployed to production.
Method 1: Container Image Signing and Verification with cosign
cosign allows you to sign and verify Open Container Initiative (OCI) container images using RHTAS.
-
Download the cosign binary from the CLI server. The CLI server was deployed during the RHTAS installation:
curl -L $CLI_SERVER_URL/clients/linux/cosign-amd64.gz | gunzip > cosign
sudo chmod +x cosign && sudo mv cosign /usr/local/bin/cosign
The CLI server also has a web interface for downloading binaries for all of the tools used with RHTAS for various platforms. In this exercise we are using
curlto download the binaries, but you can also use the web interface to download the binaries to your local workstation. -
Initialize cosign:
curl -LO $COSIGN_ROOT (1)
cosign initialize \
  --root-checksum=$(sha256sum root.json | cut -d' ' -f1) (2)
1 Downloads the known-good root.jsonfile (containing the trusted certificate and key targets) from the local TUF server.2 Initialize cosign to prepare for signing and verification later on using the known-good TUF root. -
Create a container image to sign using
podman:echo "FROM scratch" > ./tmp.Dockerfile podman build . -f ./tmp.Dockerfile -t ttl.sh/rhtas/test-image-$GUID:1h rm ./tmp.Dockerfile -
Push the image to a registry (the ephemeral ttl.sh registry):
podman push ttl.sh/rhtas/test-image-$GUID:1h -
Sign the container image:
cosign sign -y ttl.sh/rhtas/test-image-$GUID:1hBy using the
-yoption you are agreeing to the terms and conditions of the signature system based on sigstore and avoiding an interactive prompt.IF you were running this on your local workstation, a web browser would open and ask you to login with your Keycloak credentials. In this environment, that’s not possible, so you’ll see an
xdg-openerror, and then a long link in the terminal:
Copy and paste the link into a web browser (or just click on it if possible) to login to the pre-configured OIDC (Keycloak) server with your credentials:
-
Username:
{rhtas_user1_username} -
Password:
{rhtas_user1_password}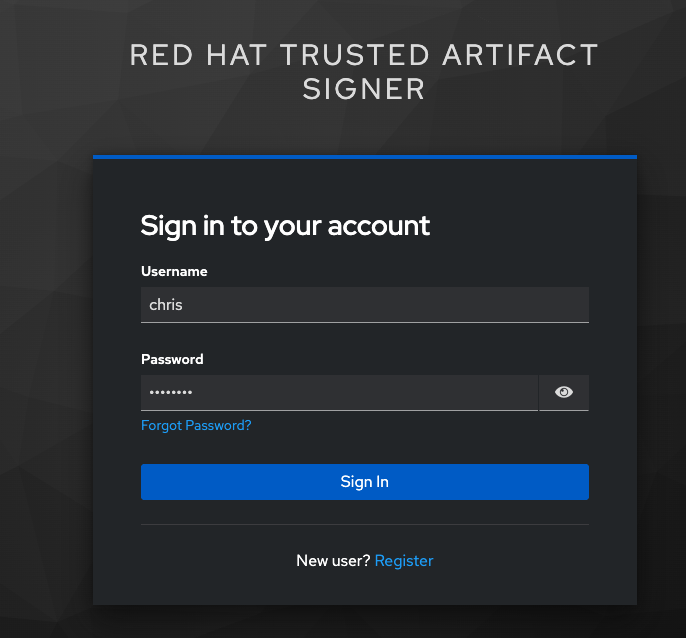
Copy/paste the resulting code back into the terminal to complete the signing process:
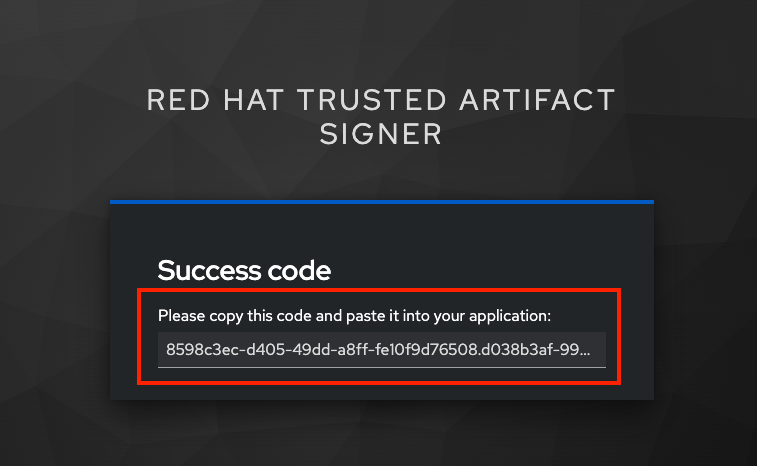
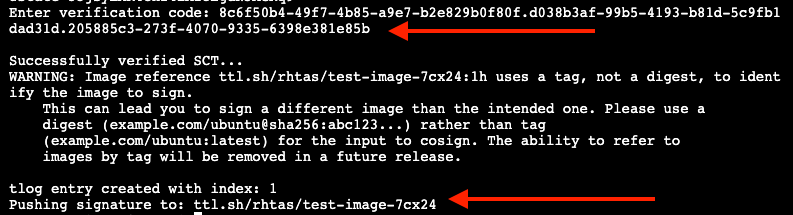
If you wait too long during this process, the short-lived authentication session and certificate will expire, and you may get timeout / deadline exceeded errors. Simply repeat the signing command.
This solution is known as keyless signing and is a recommended practice for signing container images, as it does not rely on long-lived certs and keys that could become compromised. A short-lived certificate is generated (from Fulcio) for each signature, attached to the artifact (container), and is only valid for the duration of the signature, and can be later verified against the Rekor transparency log.
-
-
Verify the signed container image:
Based on the Keycloak user that was used to sign the image, their email address was added as an identity within the signature. This vales can be used to verify the signature of the image. The email address takes the form of
<username>@redhat.com. So ifchrissigned the image, the email address would bechris@redhat.com.Set the email address in an environment variable:
export EMAIL_ADDRESS="{rhtas_user1_username}@redhat.com"Now verify the image
cosign verify \
    --certificate-identity=$EMAIL_ADDRESS \(1)
    ttl.sh/rhtas/test-image-$GUID:1h | jq (2)
1 The expected identify of the signer 2 The image to verify, and pretty-print the resulting JSON with jqTo verify, Cosign queries the transparency log (Rekor) to compare the expected identity’s public key bound to the certificate, and checks the timestamp on the signature against the artifact’s entry in the transparency log. The signature is valid if its timestamp falls within the small window of time that the key pair and certificate issued by the certificate authority were valid and that the identity of the signer matches the expected identity
If successful, you should see the following output (at the start, before the JSON representation of the signature):
The following checks were performed on each of these signatures:
  - The cosign claims were validated
  - Existence of the claims in the transparency log was verified offline
  - The code-signing certificate was verified using trusted certificate authority certificates
Along with the JSON representation of the signature.
Query the Transparency Log
You can query the transparency log to prove authenticity, integrity, and accountability for software artifacts. This ensures that the artifact was built and signed by a trusted party and hasn’t been tampered with. It also provides a record of the signing process for audit purposes, and helps determine whether malicious or unauthorized versions were introduced into the supply chain. We’ll query it in a few different ways in the following steps.
-
To start, download the rekor-cli binary from the CLI server:
curl -L $CLI_SERVER_URL/clients/linux/rekor-cli-amd64.gz | gunzip > rekor-cli sudo chmod +x rekor-cli && sudo mv rekor-cli /usr/local/bin/rekor-cli -
Search by log index:
rekor-cli get --log-index 0 \
              --rekor_server $COSIGN_REKOR_URL \
              --format json | jq
You should see the JSON representation of the first entry (index
0) in the log, containing the submitted artifact (your container image), and the inclusion proof and signed timestamp, which can be used to verify consistency and integrity of the artifact. -
Search for an email address to get the universal unique identifier (UUID):
rekor-cli search --email $EMAIL_ADDRESS \
                 --rekor_server $COSIGN_REKOR_URL\
                 --format json | jq
This command returns the UUID of any log entries that match the email address (you should see only one, but if you repeated the singing process you’d see two). This UUID can be used to get the transaction details.
-
Get transaction details by UUID (replace
<UUID>with the UUID you got from the previous step):rekor-cli get --uuid $UUID \ --rekor_server $COSIGN_REKOR_URL \ --format json | jqYou will get the same entry as before.
|
Rekor also includes a web search interface for searching through the log entries. Try it out by selecting "Email" attribute to search but and enter 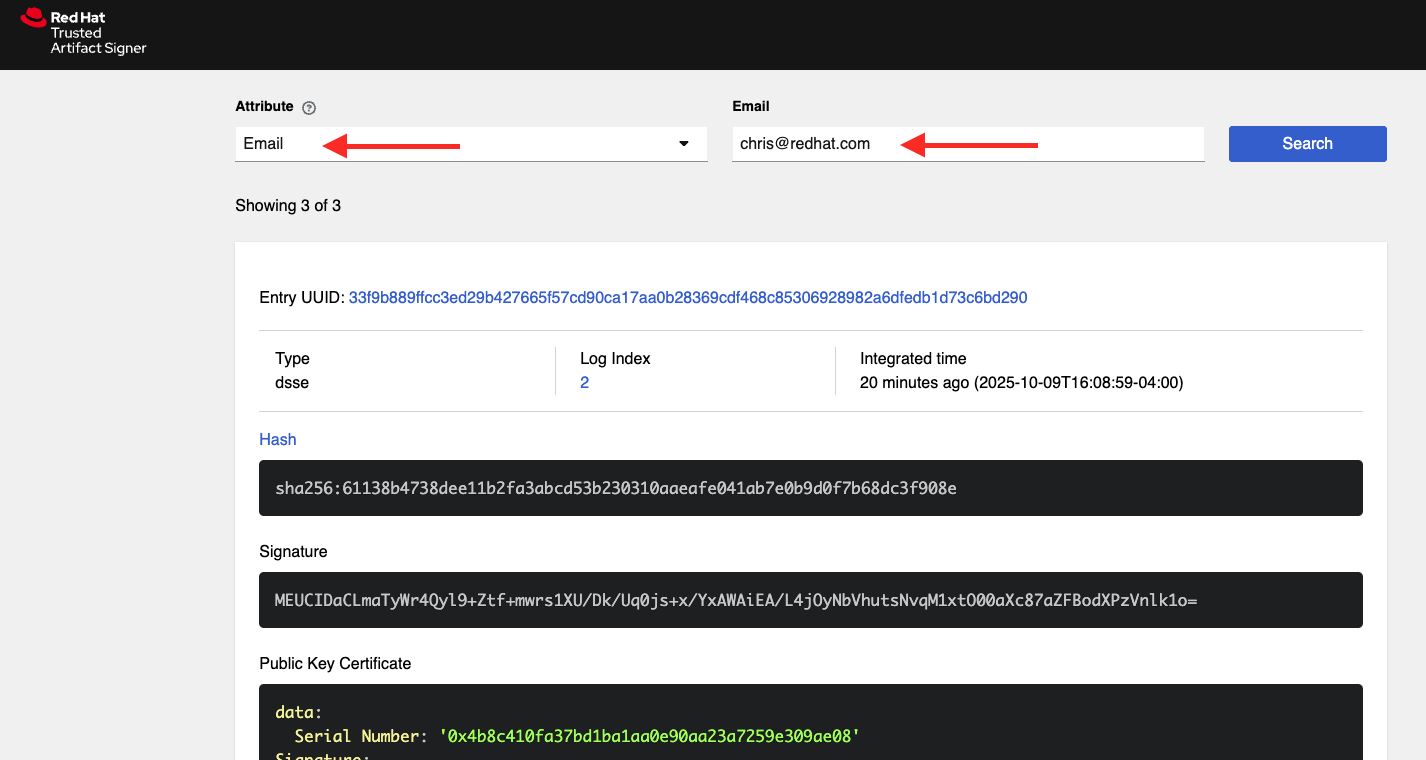
|
These methods (and others) can be used in CI pipelines to verify the authenticity of the artifacts during build, promotion, and deployment.
Method 2: Git Commit Signing and Verification with Gitsign
Gitsign enables signing and verification of Git repository commits using RHTAS. Gitsign implements keyless signing to sign Git commits with a valid OpenID Connect identity (in this case coming from Keycloak). Signing details will then be stored in the transparency log (Rekor) for subsequent verification.
Download and Install Gitsign
-
Download the gitsign binary from the CLI server web page:
curl -L $CLI_SERVER_URL/clients/linux/gitsign-amd64.gz | gunzip > gitsign sudo chmod +x gitsign && sudo mv gitsign /usr/local/bin/gitsign -
Make a temporary Git repository and configure Git to use gitsign for commit signing:
rm -rf ~/tmp-git-repo && mkdir -p ~/tmp-git-repo && cd ~/tmp-git-repo
git init
git config commit.gpgsign true (1)
git config tag.gpgsign true (2)
git config gpg.x509.program gitsign (3)
git config gpg.format x509 (4)
git config gitsign.fulcio $SIGSTORE_FULCIO_URL (5)
git config gitsign.rekor $SIGSTORE_REKOR_URL (6)
git config gitsign.issuer $SIGSTORE_OIDC_ISSUER (7)
git config gitsign.clientID trusted-artifact-signer (8)
git config user.name {rhtas_user1_username} (9)
git config user.email $EMAIL_ADDRESS (9)
1 Sign all commits 2 Sign all tags 3 Use gitsignfor signing4 Use x509 format for signing 5 Use our Fulcio instance 6 Use our Rekor instance 7 Use our OIDC provider 8 OIDC client name 9 Set the user identity. Note that Git’s user.nameanduser.emailfields are just unverified metadata. Anyone with write access can commit as anyone else. But to produce a valid, verifiable, signed commit, they must be able to authenticate against the configured OIDC provider which can be checked by thegitsign verifycommand (which we’ll do in a few more steps). -
Make a test commit and sign it:
git commit --allow-empty \(1)
           -S \(2)
           -m "Test of a signed commit" (3)
1 Allow an empty commit (for testing the process) 2 Sign the commit using gitsign3 Message for the commit The same process should be followed as before. Copy the code from the web browser into the terminal to complete the commit process and sign the commit. You should see:
tlog entry created with index: 1 [master 35fe970] Test of a signed commit -
Verify the commit:
gitsign verify --certificate-identity=$EMAIL_ADDRESS \(1)
               --certificate-oidc-issuer=$SIGSTORE_OIDC_ISSUER \(2)
               HEAD (3)
1 The expected identify of the signer 2 The OIDC issuer of the signer’s certificate 3 Which commit to verify This extracts the signature attached to the commit, verifies it against the certificate issued during the signing process, confirms the certificate chain is valid against the known good trusted root, and that the signing certificate was recorded in Rekor, and that the OIDC identity matches what’s expected.
You should see:
tlog index: 2
gitsign: Signature made using certificate ID 0xfd13bcafe1b0c9fed3d0df3345beb7ec192c94af |
gitsign: Good signature from [chris@redhat.com](https://rhbk.7cx24.apps.ocpv04.rhdp.net/realms/trusted-artifact-signer)
Validated Git signature: true
Validated Rekor entry: true
Validated Certificate claims: true
The
Good signatureand Validation confirmations indicating that the signature is valid on the commit.
|
You might have noticed that we are just verifying the |
Method 3: Policy Validation with Conforma (Enterprise Contract)
The first two methods explored above verify the authenticity of the artifact (container image or Git commit) using the signature and attestation. Conforma takes it a step further by verifying the artifact against a set of policies.
Conforma, formally known as Enterprise Contract (EC), is a tool for maintaining the security of software supply chains, and you can use it to define and enforce policies for container images. You can use the ec binary to verify the attestation (verifiable claims about any aspect of how a piece of software is produced) and signature of container images that use Red Hat’s Trusted Artifact Signer (RHTAS) signing framework. This is typically used in CI pipelines during container image promotion and deployment. Conforma policies are defined using the rego policy language.
|
You can learn much more about Conforma, policies, predicates, security frameworks like SLSA, and other related topics in the Security Best Practices module in the Red Hat Advanced Developer Suite: Technical Hands-On Enablement course available on the Red Hat Learning Platform(which you may even be enrolled in right now!). For now, let’s step through the process of using Conforma to verify the attestation and signature of a container image. |
-
Download the
ecbinary from the CLI server:curl -L $CLI_SERVER_URL/clients/linux/ec-amd64.gz | gunzip > ec-amd64 sudo chmod +x ec-amd64 && sudo mv ec-amd64 /usr/local/bin/ec -
Create a
predicate.jsonfile for SLSA provenance (Refer to the SLSA provenance predicate specifications for more information about the schema layout):cat << EOF > ~/predicate.json { "builder": { "id": "https://localhost/dummy-id" }, "buildType": "https://example.com/tekton-pipeline", "invocation": {}, "buildConfig": {}, "metadata": { "completeness": { "parameters": false, "environment": false, "materials": false }, "reproducible": false }, "materials": [] } EOFThis file is just an example with dummy data. In a real-world scenario, you would use the actual data from the build of the container image, including a real builder ID, links to source repos, dependencies in
materials, and how it was built (in theinvocationandbuildConfigfields). -
Sign and attach ("attest") the
predicate.jsonfile to the test image:cosign attest -y \(1) --predicate ~/predicate.json \(2) --type slsaprovenance \(3) ttl.sh/rhtas/test-image-$GUID:1h (4)1 Skip confirmation prompts for non-destructive operations 2 Use the predicate.jsonfile we created to attach the attestation to the image3 Use the slsaprovenancetype for the attestation.4 The image to attest The same process should be followed as before. Copy the code from the web browser into the terminal to complete the attestation process. You should see:
tlog entry created with index: xxxxThis makes a record in the transparency log (Rekor) for the attestation. The attestation in this case is the SLSA provenance attestation, recording who built it, what source repo, which builder, what commands, what dependencies, etc.
-
Verify the image has at least one attestation and signature:
cosign tree ttl.sh/rhtas/test-image-$GUID:1hThis outputs any attached attestation and signature for the image. You should see something like this (at least 1 attestation and 1 signature):
📦 Supply Chain Security Related artifacts for an image: ttl.sh/rhtas/test-image-$GUID:1h@sha256:7de5fa822a9d1e507c36565ee0cf50c08faa64505461c844a3ce3944d23efa35 └── 💾 Attestations for an image tag: ttl.sh/rhtas/test-image-$GUID:1h@sha256:7de5fa822a9d1e507c36565ee0cf50c08faa64505461c844a3ce3944d23efa35.att └── 🍒 sha256:40d94d96a6d3ab3d94b429881e1b470ae9a3cac55a3ec874051bdecd9da06c2e └── 🔐 Signatures for an image tag: ttl.sh/rhtas/test-image-$GUID:1h@sha256:7de5fa822a9d1e507c36565ee0cf50c08faa64505461c844a3ce3944d23efa35.sig └── 🍒 sha256:f32171250715d4538aec33adc40fac2343f5092631d4fc2457e2116a489387b7 -
Validate conformance of container images with the provided policies:
ec validate image --image ttl.sh/rhtas/test-image-$GUID:1h \(1)
                  --certificate-identity $EMAIL_ADDRESS \(2)
                  --certificate-oidc-issuer $OIDC_ISSUER_URL \(3)
                  --output yaml --show-successes --info (4)
1 The image to validate 2 The expected identity of the signer 3 The OIDC issuer of the signer’s certificate 4 Output the results in YAML format and list the successful policy checks Conforma generates a pass-fail report with details on any security violations. When you add the
--infoflag, the report includes more details and possible solutions for any violations found.
If all verification steps complete successfully, your RHTAS installation is working correctly and ready for production use.
|
Without specifying a policy, Conforma just does the minimal integrity checks and calls it a day. In practice, organizations would typically define policies to check against, and use Conforma to validate the artifacts against those policies. For example, the Conforma project has some pre-defined policy definitions for common security best practices that organizations can start with, and it is designed to be extensible to allow for organizations to define their own policies. You can see how our dummy data fares against these policies (even using the basic Here you can see a number of violations in the output indicating our dummy data failed the policy checks. The Conforma Release Policy page shows what’s included in |
Extra Credit: Updating Certificate Expiration Date
The Update Framework (TUF) is used by RHTAS as a framework for securing software update systems. TUF refers to the RHTAS services as trusted root targets. There are four trusted targets, one for each RHTAS service: Fulcio, Certificate Transparency (CT) log, Rekor, and Timestamp Authority (TSA). Client software, such as cosign, use the RHTAS trust root targets to sign and verify artifact signatures.
By default, the expiration date of all metadata files for these services is 52 weeks from the time you deploy the RHTAS service. Red Hat recommends choosing shorter expiration periods, and rotating your public keys and certificates often. Doing these maintenance tasks regularly can help prevent attacks on your code base.
To update the expiration date of the trusted root targets, you can use the tuftool binary. You will download a snapshot of the current trusted root targets, update the expiration dates in place, and then re-run the Ansible playbook to update the TUF repository.
Follow these steps to update the expiration dates of the trusted root targets (a typical day-2 administrative task that must be performed regularly, before expiration):
-
First, check out what the current expiration date is for TUF roots (TUF’s root key expiration date is defined in the root metadata file accessible from the TUF server, and versioned, and since there’s only 1 version so far, the name would be
1.root.json):curl -s https://tuf.$BASE_HOSTNAME/1.root.json | jq '.signed.expires'The date returned should be 1 year from the current date.
-
Download the
tuftoolbinary from the CLI server:curl -L $CLI_SERVER_URL/clients/linux/tuftool-amd64.gz | gunzip > tuftool-amd64 sudo chmod +x tuftool-amd64 && sudo mv tuftool-amd64 /usr/local/bin/tuftool -
Configure your shell environment for using
tuftool:export WORK="${HOME}/trustroot-example" export ROOT="${WORK}/root/root.json" export KEYDIR="${WORK}/keys" export INPUT="${WORK}/input" export TUF_REPO="${WORK}/tuf-repo" export REMOTE_KEYS_VOLUME=$(ssh lab-user@rhtas -t "sudo podman volume mount tuf-signing-keys" | tr -d '[:space:]') export REMOTE_TUF_VOLUME=$(ssh lab-user@rhtas -t "sudo podman volume mount tuf-repository" | tr -d '[:space:]') export TIMESTAMP_EXPIRATION="in 1 day" export SNAPSHOT_EXPIRATION="in 1 day" export TARGETS_EXPIRATION="in 26 weeks" export ROOT_EXPIRATION="in 26 weeks" -
Create temporary directories to hold the
tuftoolinput and output, and download them usingrsync:mkdir mkdir -p "${WORK}/root/" "${KEYDIR}" "${INPUT}" "${TUF_REPO}" rsync -r --rsync-path="sudo rsync" lab-user@rhtas:"${REMOTE_KEYS_VOLUME}/" "${KEYDIR}" rsync -r --rsync-path="sudo rsync" lab-user@rhtas:"${REMOTE_TUF_VOLUME}/" "${TUF_REPO}" cp "${TUF_REPO}/root.json" "${ROOT}" ls ${KEYDIR} ${TUF_REPO}This will download the metadata files (prefixed with
1). -
Update the expiration dates in place:
The Timestamp and Snapshot metadata should normally have a short expiration (1 day), whereas the Root and Targets metadata should expire less often (1 year). A good rule of thumb is the more often the metadata changes, the sooner it should expire. See the TUF documentation for more guidance. Run this command to update the expiration dates:
tuftool update \
  --root "${ROOT}" \
  --key "${KEYDIR}/timestamp.pem" \
  --key "${KEYDIR}/snapshot.pem" \
  --key "${KEYDIR}/targets.pem" \
  --timestamp-expires "${TIMESTAMP_EXPIRATION}" \
  --snapshot-expires "${SNAPSHOT_EXPIRATION}" \
  --targets-expires "${TARGETS_EXPIRATION}" \
  --outdir "${TUF_REPO}" \
  --metadata-url "file://${TUF_REPO}"
ls ${KEYDIR} ${TUF_REPO}
You will see new metadata files (prefixed with
2) with the updated expiration dates. -
Update the root expiration date:
Typically you would only update the root expiration date if it is about to expire. Let’s update ours just for fun. Run this command to update the root expiration date (and sign it and copy it to the proper location):
tuftool root expire "${ROOT}" "${ROOT_EXPIRATION}" tuftool root bump-version "${ROOT}" tuftool root sign "${ROOT}" -k "${KEYDIR}/root.pem" export NEW_ROOT_VERSION=$(cat "${ROOT}" | jq -r ".signed.version") cp "${ROOT}" "${TUF_REPO}/root.json" cp "${ROOT}" "${TUF_REPO}/${NEW_ROOT_VERSION}.root.json" ls ${KEYDIR} ${TUF_REPO} -
Create an archive of the metadata files
To upload, you need to create an archive of the metadata files. Run this to create the archive and create a new ansible variables file to reference it:
tar -C "${WORK}" -czvf ~/repository.tar.gz tuf-repo
cat <<EOF > ~/rhtas_trust_root_update.yml
tas_single_node_trust_root:
  full_archive: "{{ lookup('file', 'repository.tar.gz') | b64encode }}"
EOF
With the archive created, you can re-invoke the Ansible playbook with the reference to the new archive.
-
Run the playbook again and pass the archive as the trust root:
cd ~ && \
ansible-navigator \
  -m stdout \
  --eei=localhost/ansible_ee \
  --pp=missing \
  run install_rhtas.yml \
  --pae=false \
  -i inventory \
  -e @rhtas_trust_root_update.yml \
  -e tas_single_node_registry_username="$REGISTRY_USERNAME" \
  -e tas_single_node_registry_password="$REGISTRY_PASSWORD"
Wait for the playbook to finish (it will take a few minutes, and you may notice lines related to the usage of the supplied archive).
-
Verify the new expiration dates
Once the server comes back up, re-run the command to check the expiration dates:
echo "Root Version 1:"
curl -s  https://tuf.$BASE_HOSTNAME/1.root.json | jq '.signed.expires'
echo "Root Version 2:"
curl -s  https://tuf.$BASE_HOSTNAME/2.root.json | jq '.signed.expires'
echo "Timestamp:"
curl -s  https://tuf.$BASE_HOSTNAME/timestamp.json | jq '.signed.expires'
The version 1 root should have the same expiration date (1 year from now), but the version 2 root should have the new expiration date (26 weeks from now). The Timestamp metadata should have the new expiration date (1 day from now).
You can repeat this process to avoid expiration of the TUF services. You are also encouraged to rotate the keys and certificates for the TUF services regularly to maintain a secure coding environment for developers and prevent mix-and-match attacks on a code base. More information can be found in the RHTAS documentation.
Next Steps
With Red Hat Trusted Artifact Signer installed and configured, you can now:
-
Sign software artifacts
-
Verify artifact integrity
-
Integrate with your CI/CD pipelines
-
Configure policy-based signing workflows
CI/CD Integration with RHADS Components
RHTAS integrates seamlessly with other Red Hat Advanced Developer Suite components to create comprehensive CI/CD workflows. For example, you can use Red Hat Developer Hub templates to create project scaffolds that automatically include container image signing via cosign and Git commit signing via gitsign in their CI pipelines. Using Conforma’s policy validation, you can enforce security gates that verify artifact signatures, SBOMs and attestations before promoting images to production environments. This creates a cohesive developer experience where all artifacts are cryptographically signed, provenance is tracked through SLSA attestations, and policies ensure compliance before deployment.
For more advanced configuration options and day-2 operation capabilities on RHEL, refer to the official Red Hat Trusted Artifact Signer documentation.